Opsbeacon
Apps
In OpsBeacon, users can create custom apps comprising elements, actions, and permissions. Actions trigger specific commands that manipulate elements, while permissions determine which user roles can execute these actions.
To elucidate further, consider the following example app:
We have a user management application that facilitates control over users in our product. Through this application, we can effortlessly add new users and remove existing ones. Additionally, we have the ability to conveniently adjust user statuses by activating or deactivating them.
JSON format of this example app to create it:
{
        "form":{
            "elements":[
                {"id":1,"name":"value", "type":"text", "label":"Name"},
                { "id":2,"name":"submit","type":"submit","label":"Deploy", "action":"devcontroller action --add --value {{value}}"}
            ]
        },
        "data":{
            "elements":[{
                "type":"table",
                "headers":["id","name","status"],
                "rowActions": [
                        { "name": "Remove", "action": "devcontroller action --remove --id {{id}}" },
                        { "name": "Activate User", "action": "devcontroller action --id {{id}} --status active" },
                        { "name": "Deactivate User", "action": "devcontroller action --id {{id}} --status inactive" }
                    ],
                "dataSource":"devcontroller action --list"
            }]
        },
        "permissions": [
            {"command": "devcontroller action --list", "role": "read-only"},
            {"command": "devcontroller action --remove --id {{id}}", "role": "read-only"},
            {"command": "devcontroller action --add --value {{value}}", "role": "read-only"},
            {"command": "devcontroller action --id {{id}} --status {{status}}", "role": "read-only"}
        ]
    }
Let's break down this JSON into its different sections for a clearer understanding:
1. Form Elements
A form element must be one of two types: text or submit. Text form elements serve as input fields, while submit form elements act as buttons to trigger desired actions. If a form element is of type "submit," then we need to specify the associated action in the action field. The label field contains the title of the field, while the name field represents the value of the field.
"form":{
            "elements":[
                {"id":1,"name":"value", "type":"text", "label":"Name"},
                {"id":2,"name":"submit","type":"submit","label":"Deploy", "action":"devcontroller action --add --value {{value}}"}
            ]
        },
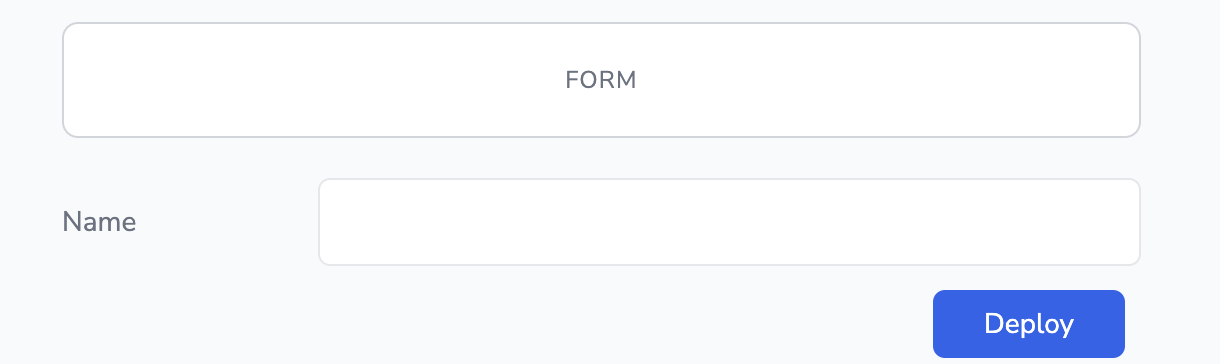
In our example, we decided to put two form elements to our application. First one is a text element that takes name of the user and other one is a submit element which adds this name to our data table.
Illustration of this section:
2. Data Elements
Data elements comprise the data table displayed in the app. Headers represent the columns of the table. In the row actions field, we define the actions that will manipulate the data. Lastly, the data source contains the action that the app uses to retrieve the data for the table.
"data":{
            "elements":[{
                "type":"table",
                "headers":["id","name","status"],
                "rowActions": [
                        { "name": "Remove", "action": "devcontroller action --remove --id {{id}}" },
                        { "name": "Activate User", "action": "devcontroller action --id {{id}} --status active" },
                        { "name": "Deactivate User", "action": "devcontroller action --id {{id}} --status inactive" }
                    ],
                "dataSource":"devcontroller action --list"
            }]
        },
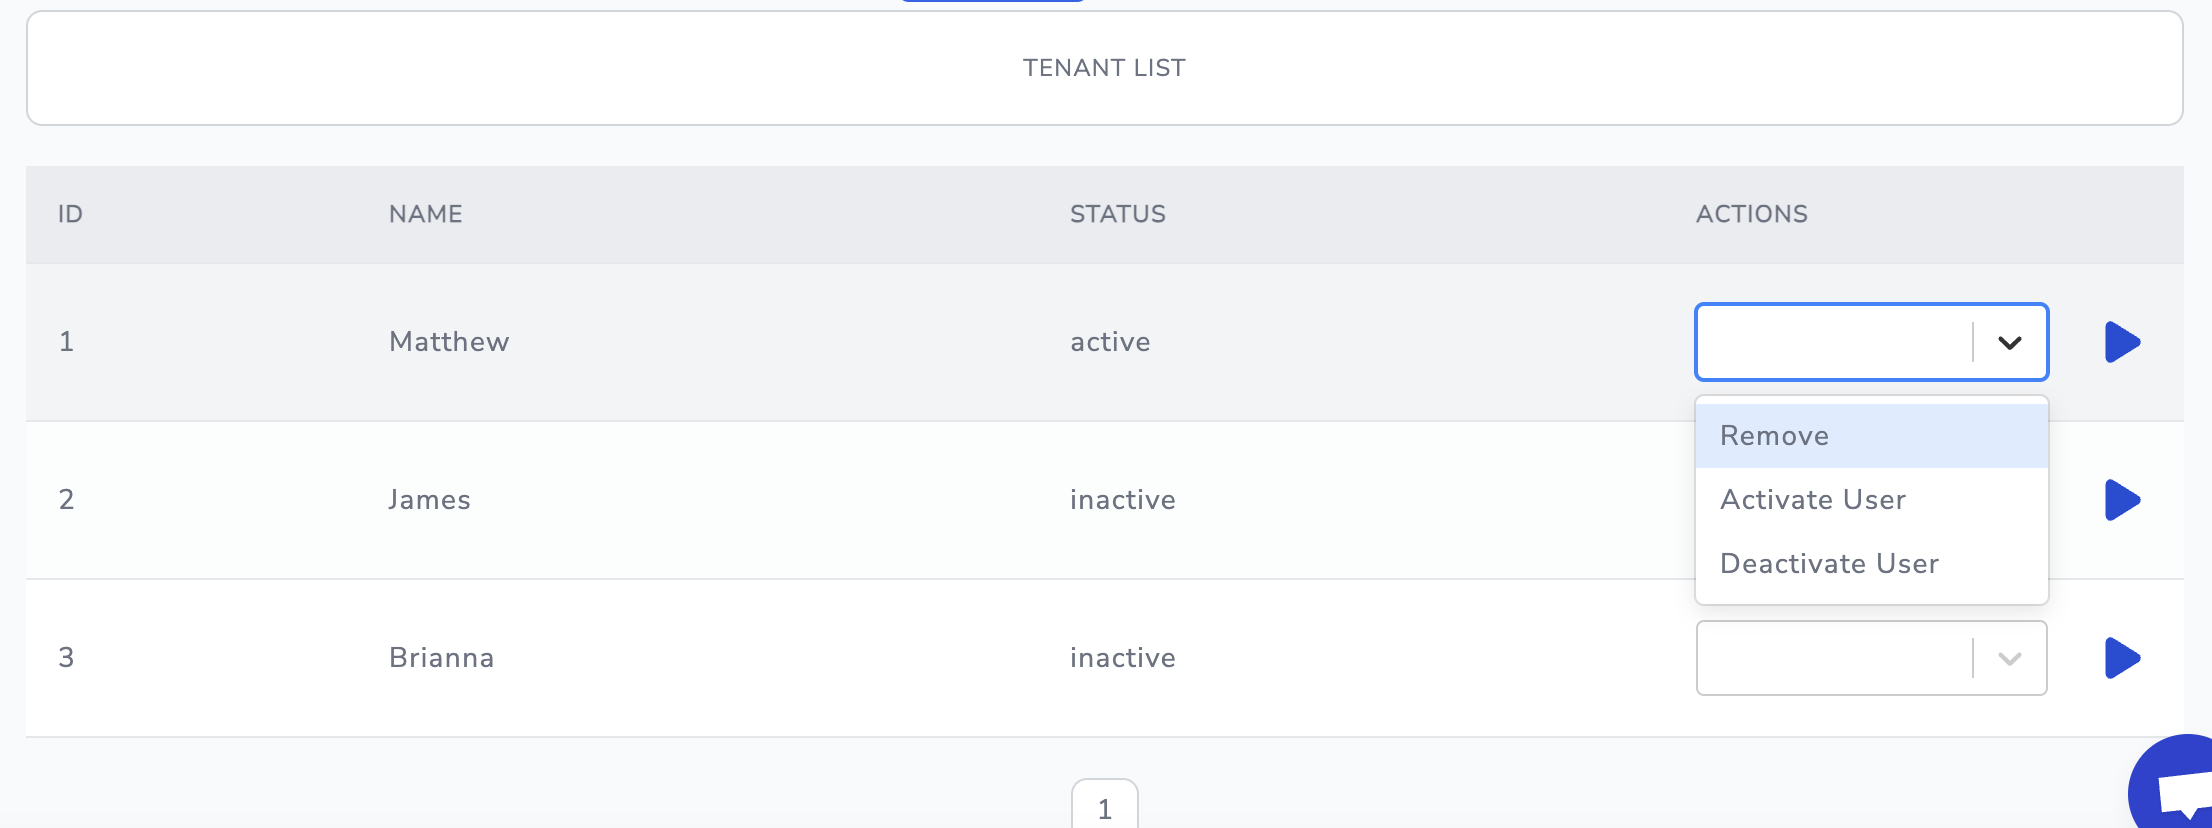
In our example, the table is structured with three columns. We've also implemented three actions to interact with the data rows: one for removing corresponding entries from the table, another for setting a user's status to active, and the last for changing a user's status to inactive.
Illustration of this section:
3. Permissions
User roles' permissions to trigger actions within the app can be specified in the permissions section. The command field indicates the action, while the role field displays the minimum user role level permitted to execute the command within the app.
"permissions": [
            {"command": "devcontroller action --list", "role": "read-only"},
            {"command": "devcontroller action --remove --id {{id}}", "role": "admin"},
            {"command": "devcontroller action --add --value {{value}}", "role": "read-only"},
            {"command": "devcontroller action --id {{id}} --status {{status}}", "role": "read-only"}
        ]
    }
In our example, only administrators have the authority to remove any user from the table. Other actions are allowed for all levels of user roles.
Quick Applicable Example
Before applying the example below, you need to create a public REST connection and configure a REST command to send a GET request to the following URL:
https://jsonplaceholder.typicode.com/todos
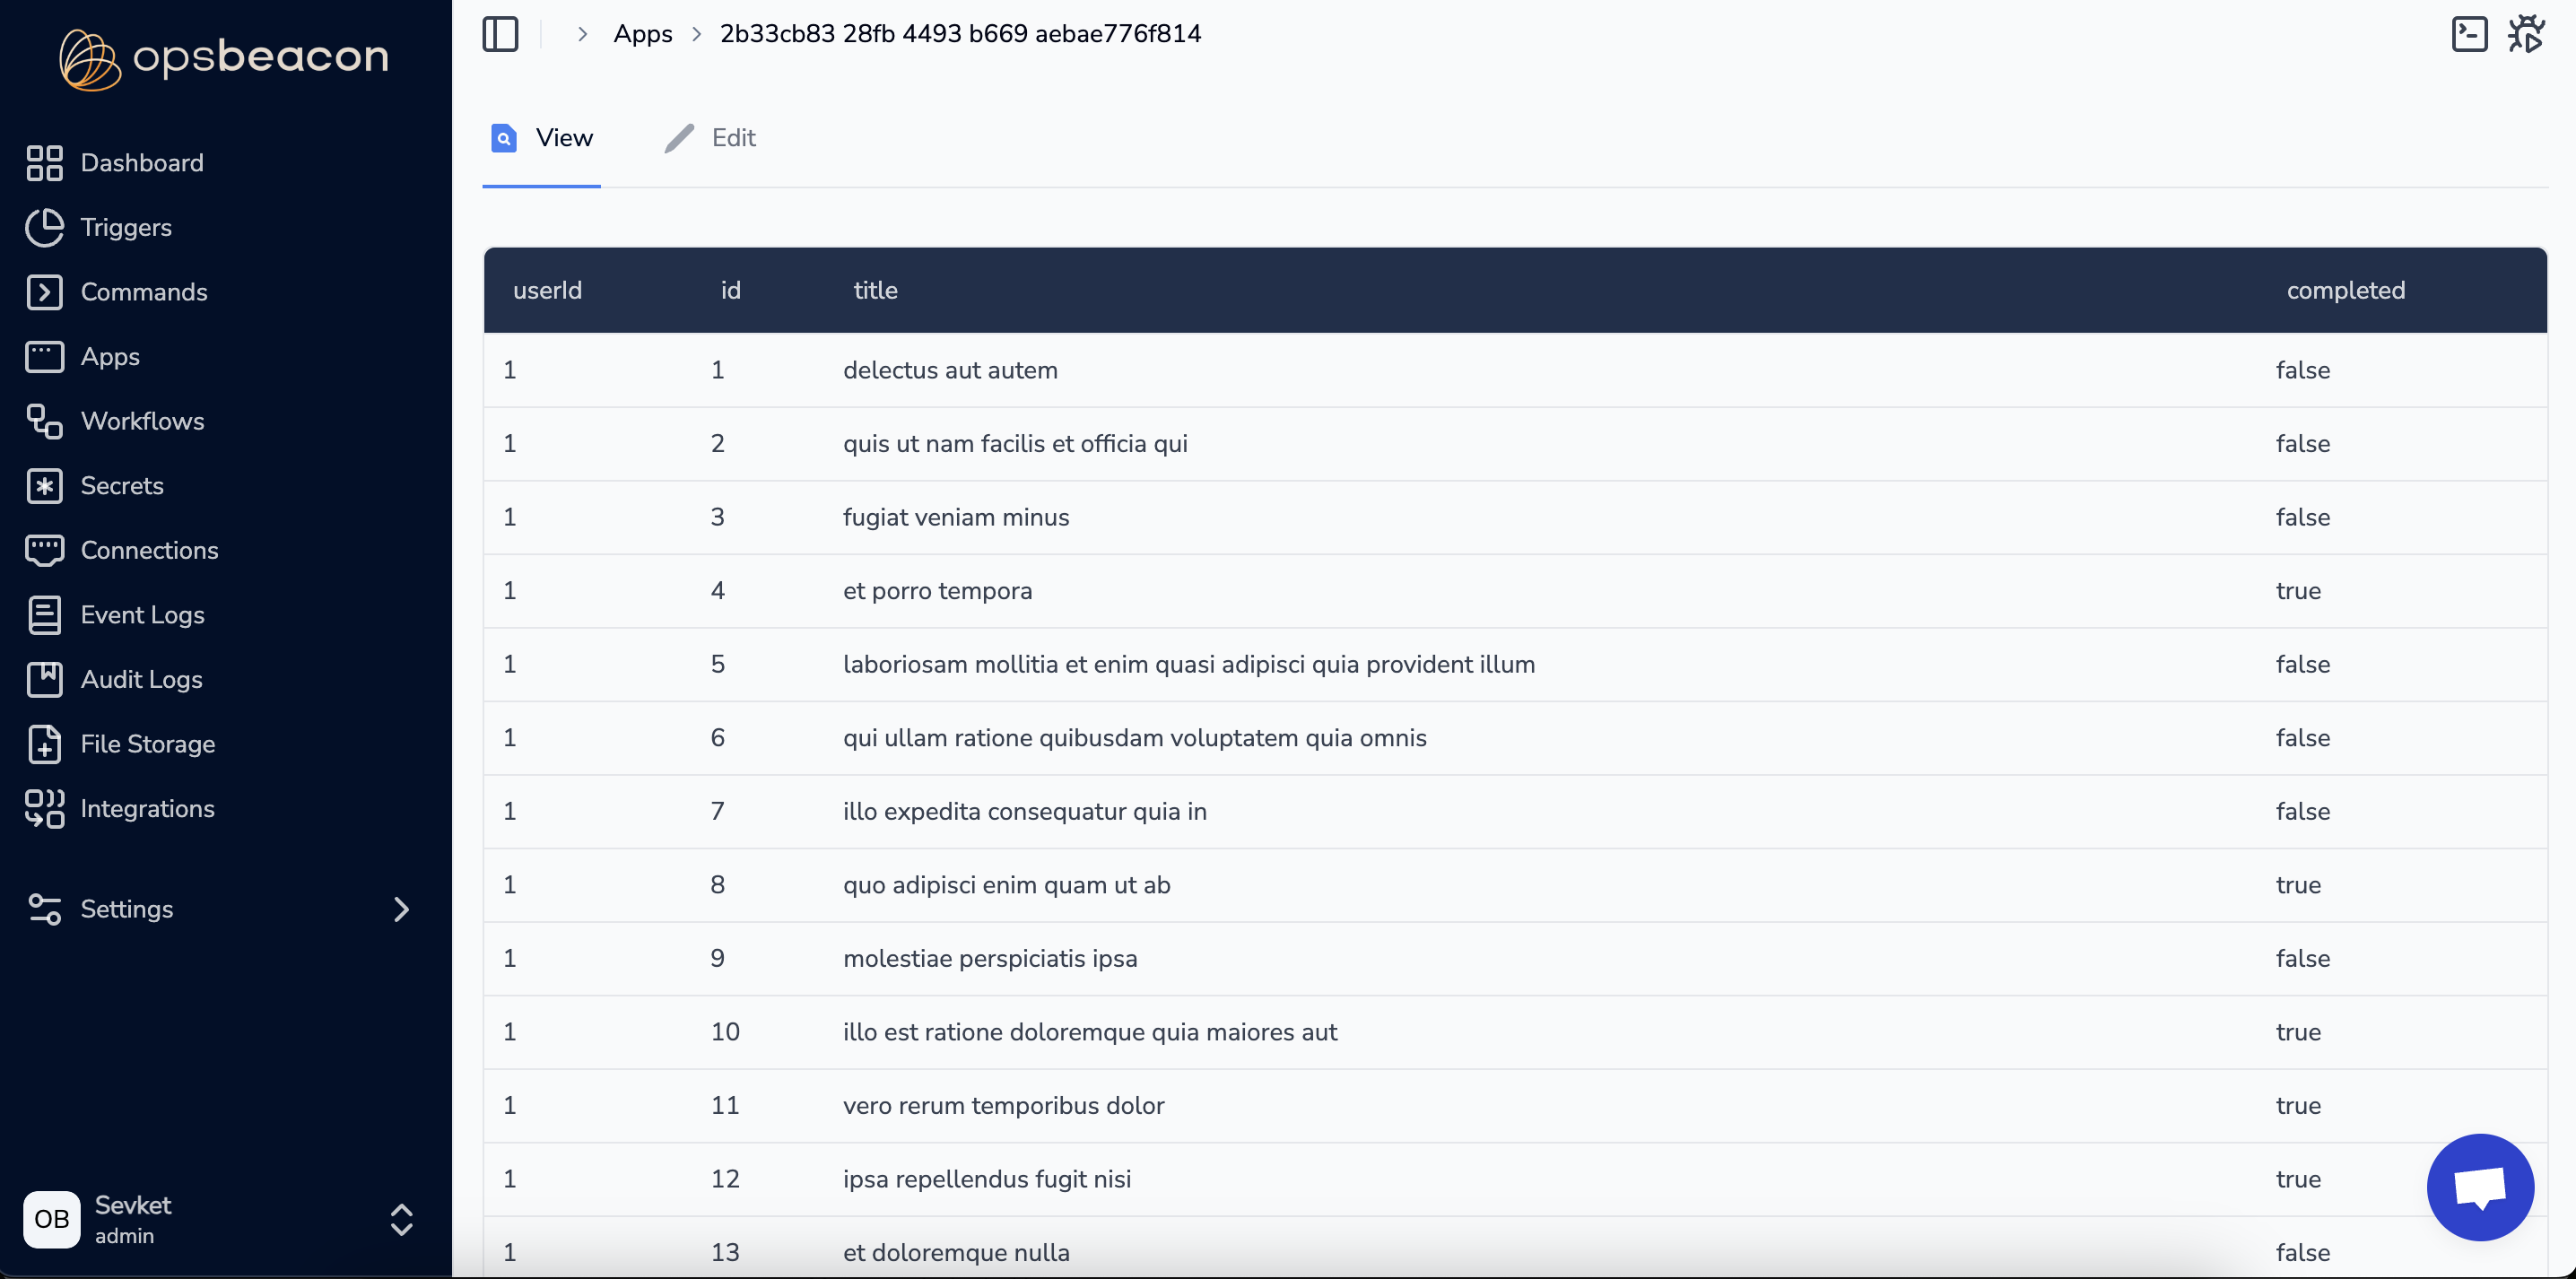
Once the connection and command are set up, simply copy and paste the provided JSON into the app's JSON editor. The app will then display the output in a structured table format.
Connection: 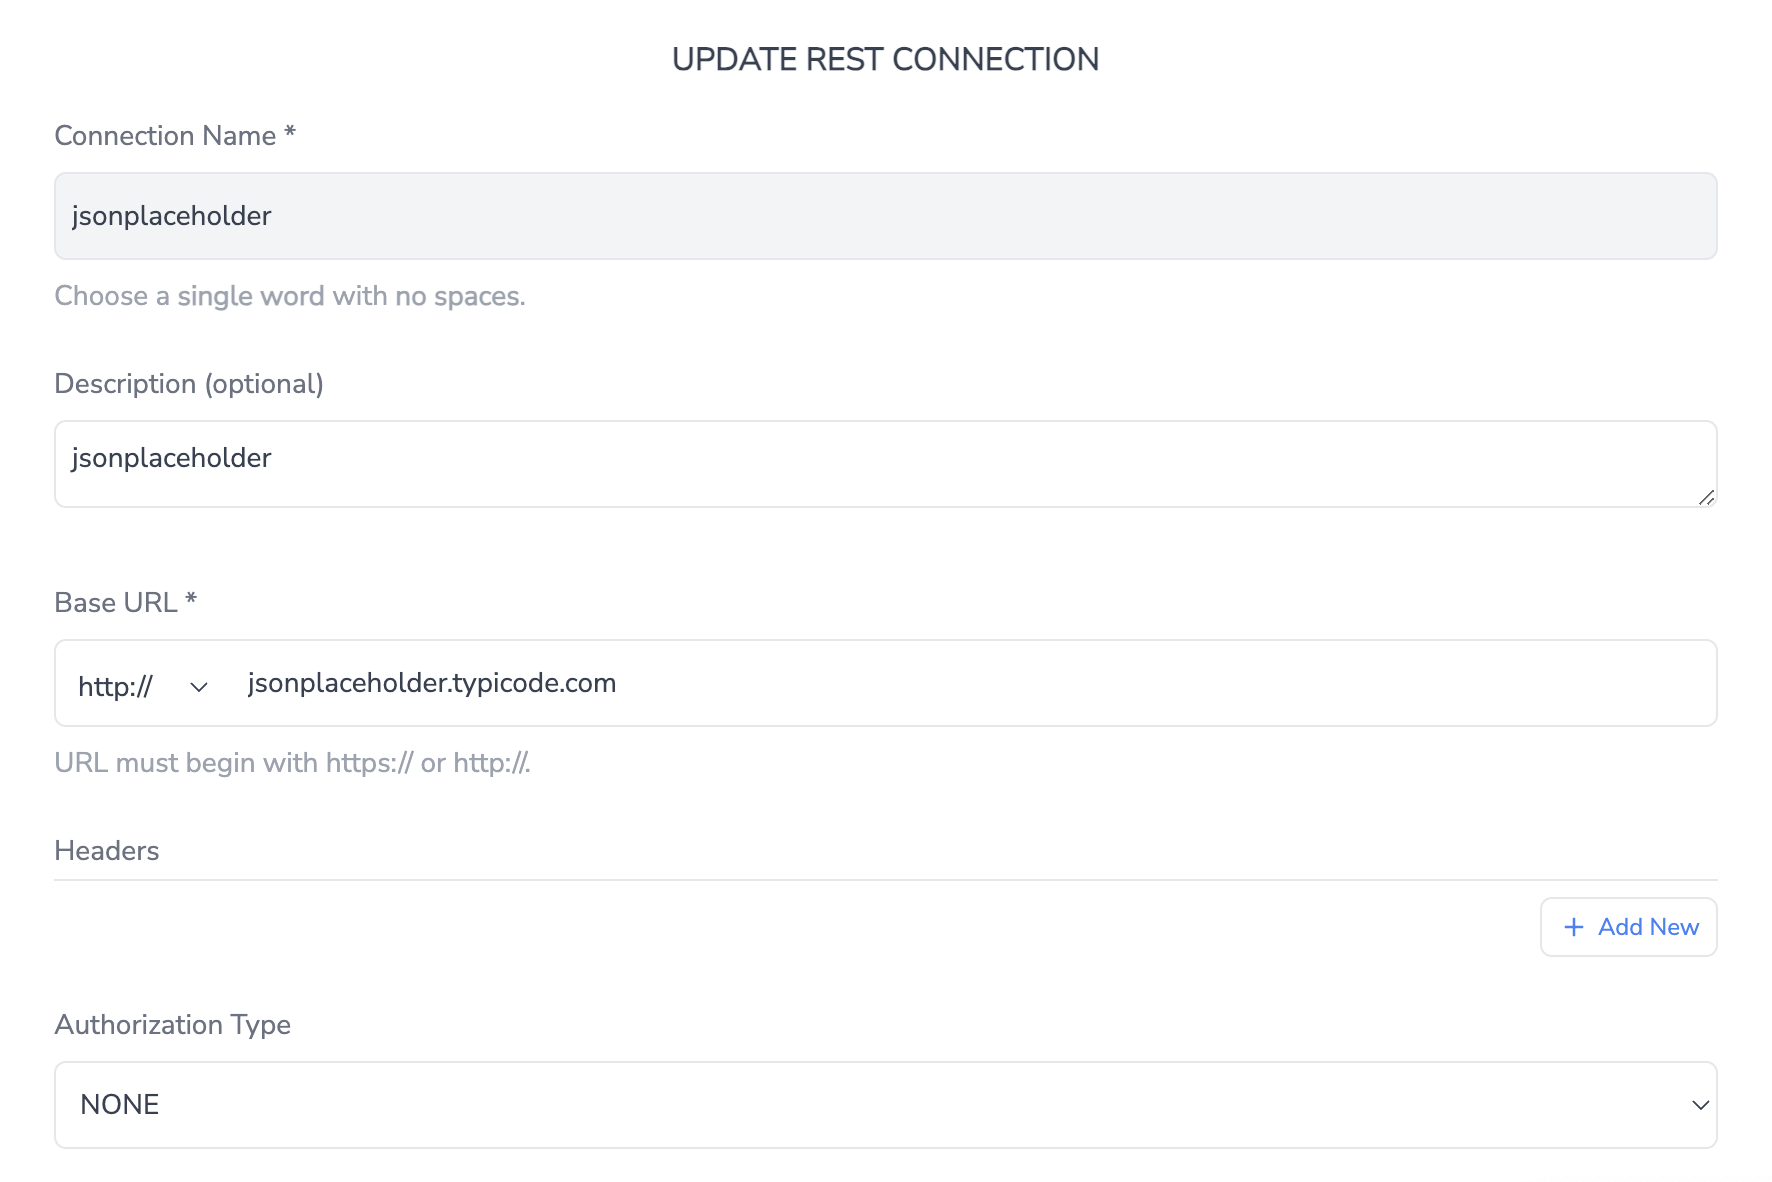
Command: 
JSON Structure of the App:
{
  "data": {
    "elements": [
      {
        "dataSource": "jsonplaceholder todos",
        "headers": [
          "userId",
          "id",
          "title",
          "completed"
        ],
        "rowActions": [],
        "type": "table"
      }
    ]
  },
  "permissions": [
    {
      "command": "jsonplaceholder todos",
      "role": "read-only"
    }
  ]
}
The app view should be shown as: