Opsbeacon
Cron
Cron triggers provide a scheduling framework for your executions, allowing you to precisely determine when your actions are initiated. With cron triggers, you can schedule commands, connections, or workflows to run at specific times or on a regular basis.
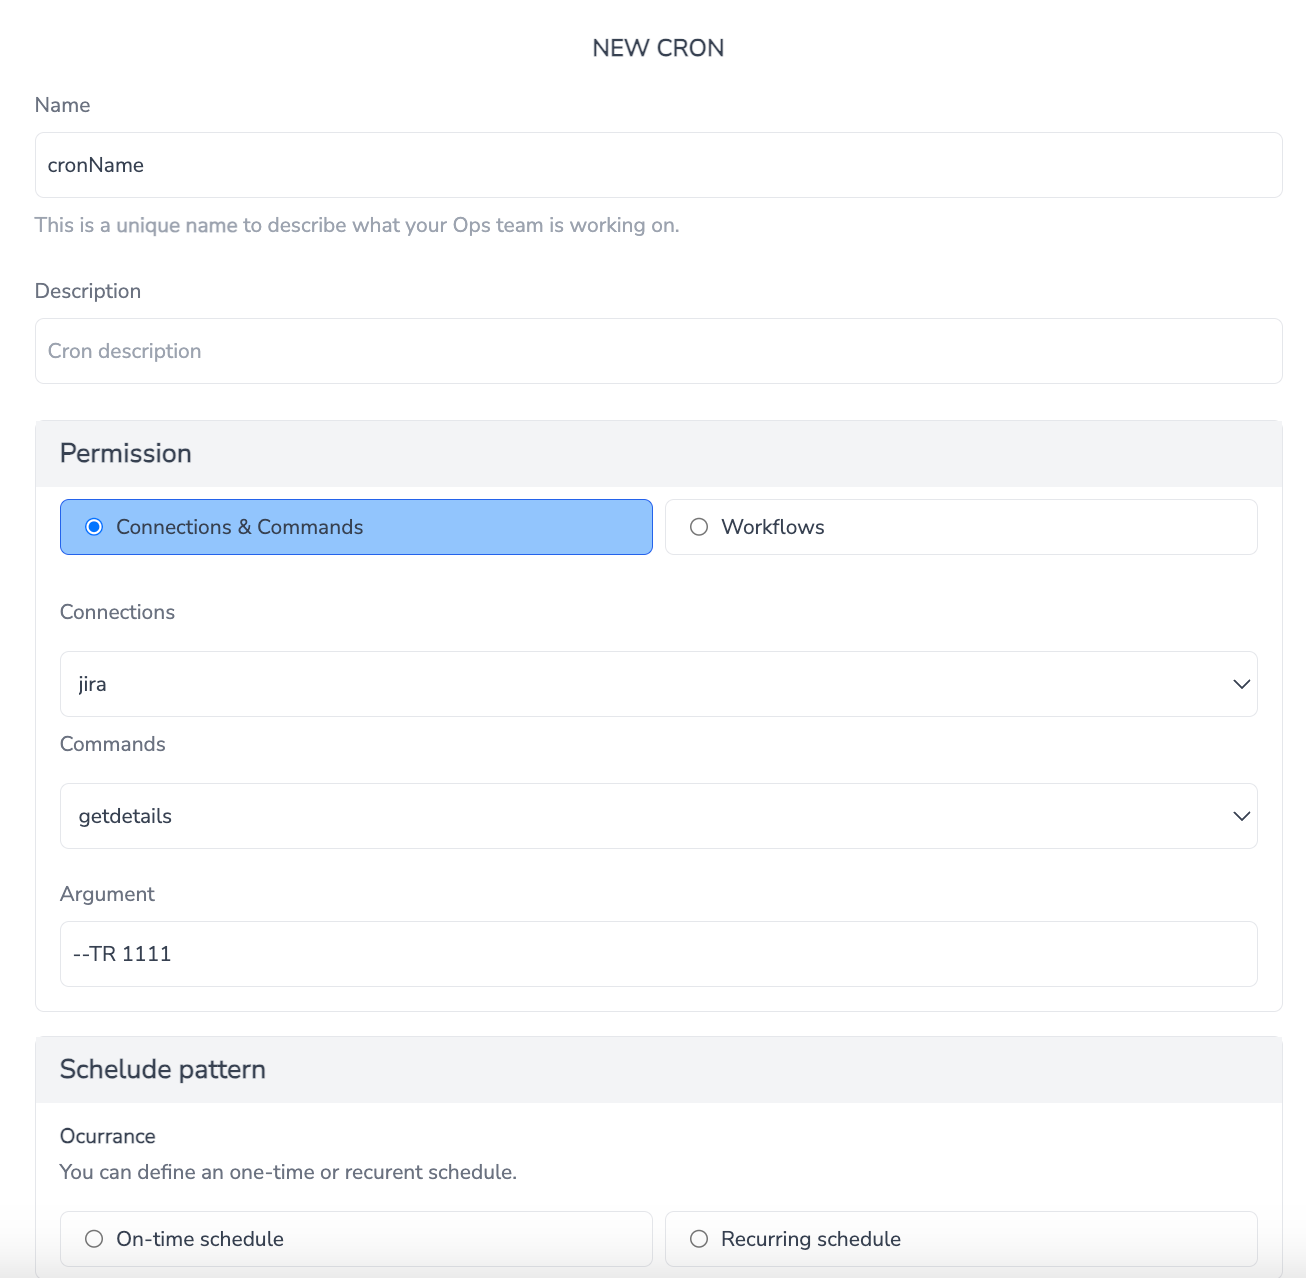
Setting up a Cron Trigger
To set up a Cron in OpsBeacon, follow these steps:
- Navigate to the Cebhook page from the “Triggers” menu.
- Create a Cebhook.
- Give your Cebhook a name and assign Commands&Connections or Workflows that that will be triggered when the scheduled time comes.
- Select a schedule type: On-Time Schedule or Recurring Schedule. Recurring schedule consists of two schedules: Cron-Based Schedule and Rate-Based Schedule
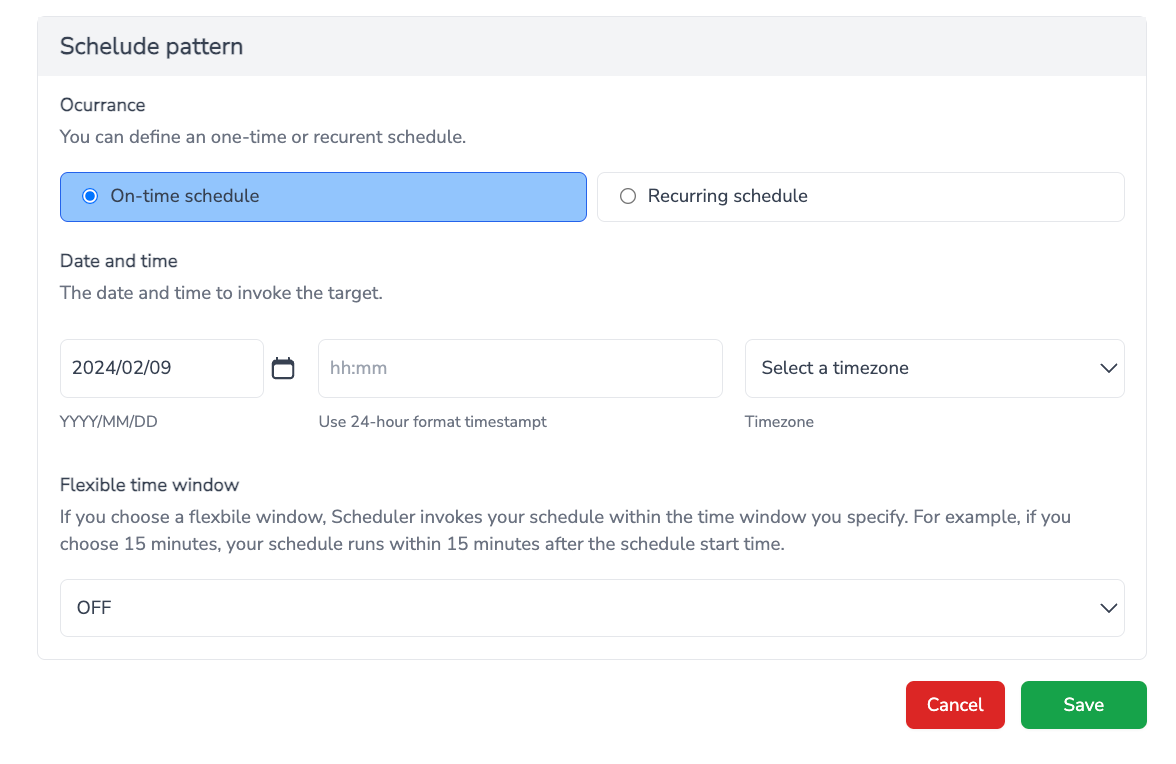
On-Time Schedule
For an on-time schedule, follow these steps:
- Choose the "On-Time Schedule" option.
- Specify the date, hour, and timezone for the schedule.
- Optionally, enable the "Flexible Time" feature to allow the schedule to run within 15 minutes after the specified start time.
- Save the cron trigger.
Cron-Based Schedule
To set up a cron-based schedule, follow these steps:
- Choose the "Recurring Schedule" option.
- Select the "Cron-Based Schedule" option.
- Enter a cron expression to define the schedule. For example, to run at 8:00 a.m. PST on the first Monday of every month, you could use 0 8 1-7 * 1.
- Optionally, enable the "Flexible Time" feature.
- Specify the timezone.
- Save the cron trigger.
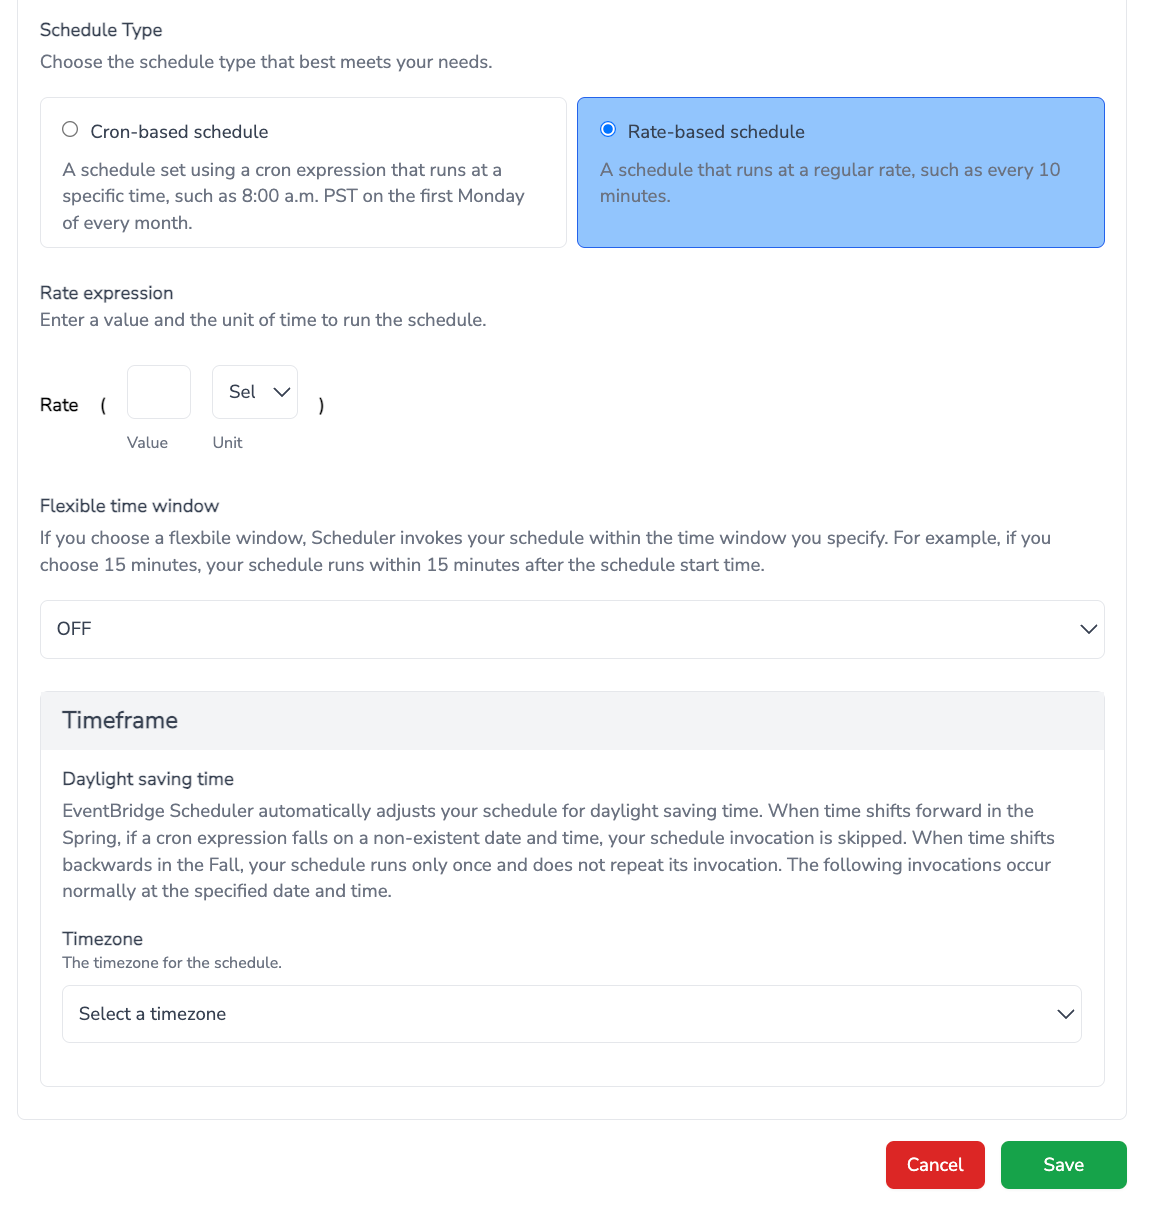
Rate-based Schedule
To set up a rate-based schedule, follow these steps:
- Choose the "Recurring Schedule" option.
- Select the "Rate-based Schedule" option.
- Specify the rate at which the schedule should run, such as every 10 minutes.
- Optionally, enable the "Flexible Time" feature.
- Specify the timezone for the schedule.
- Save the cron trigger.