Opsbeacon
How to add Google SSO Login
OpsBeacon supports social logins using Slack and Google. In this document, we will explain how to setup Google login for your on-premise OpsBeacon deployment.
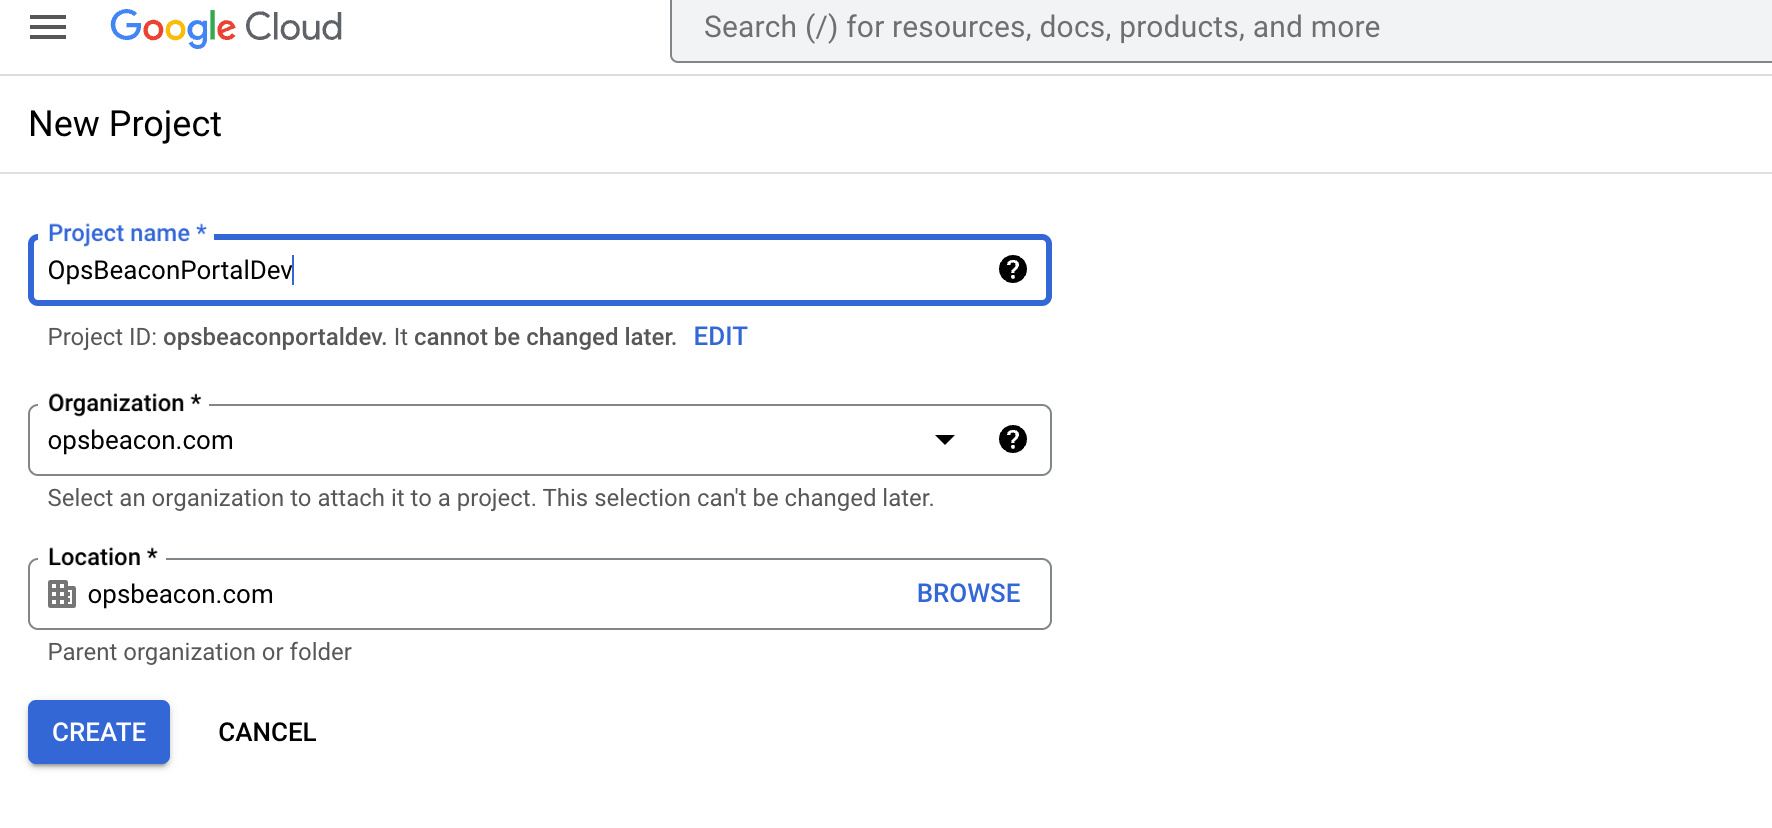
Step 1: Create Google Project
Go to Google Cloud Console and create a new project.
Step 2: Create Oath Screen
Once the project is created, make sure its selected as the active project on the top left dropdown Navigation Menu → APIs and Services → Oath Consent Screen Select User Type as internal.
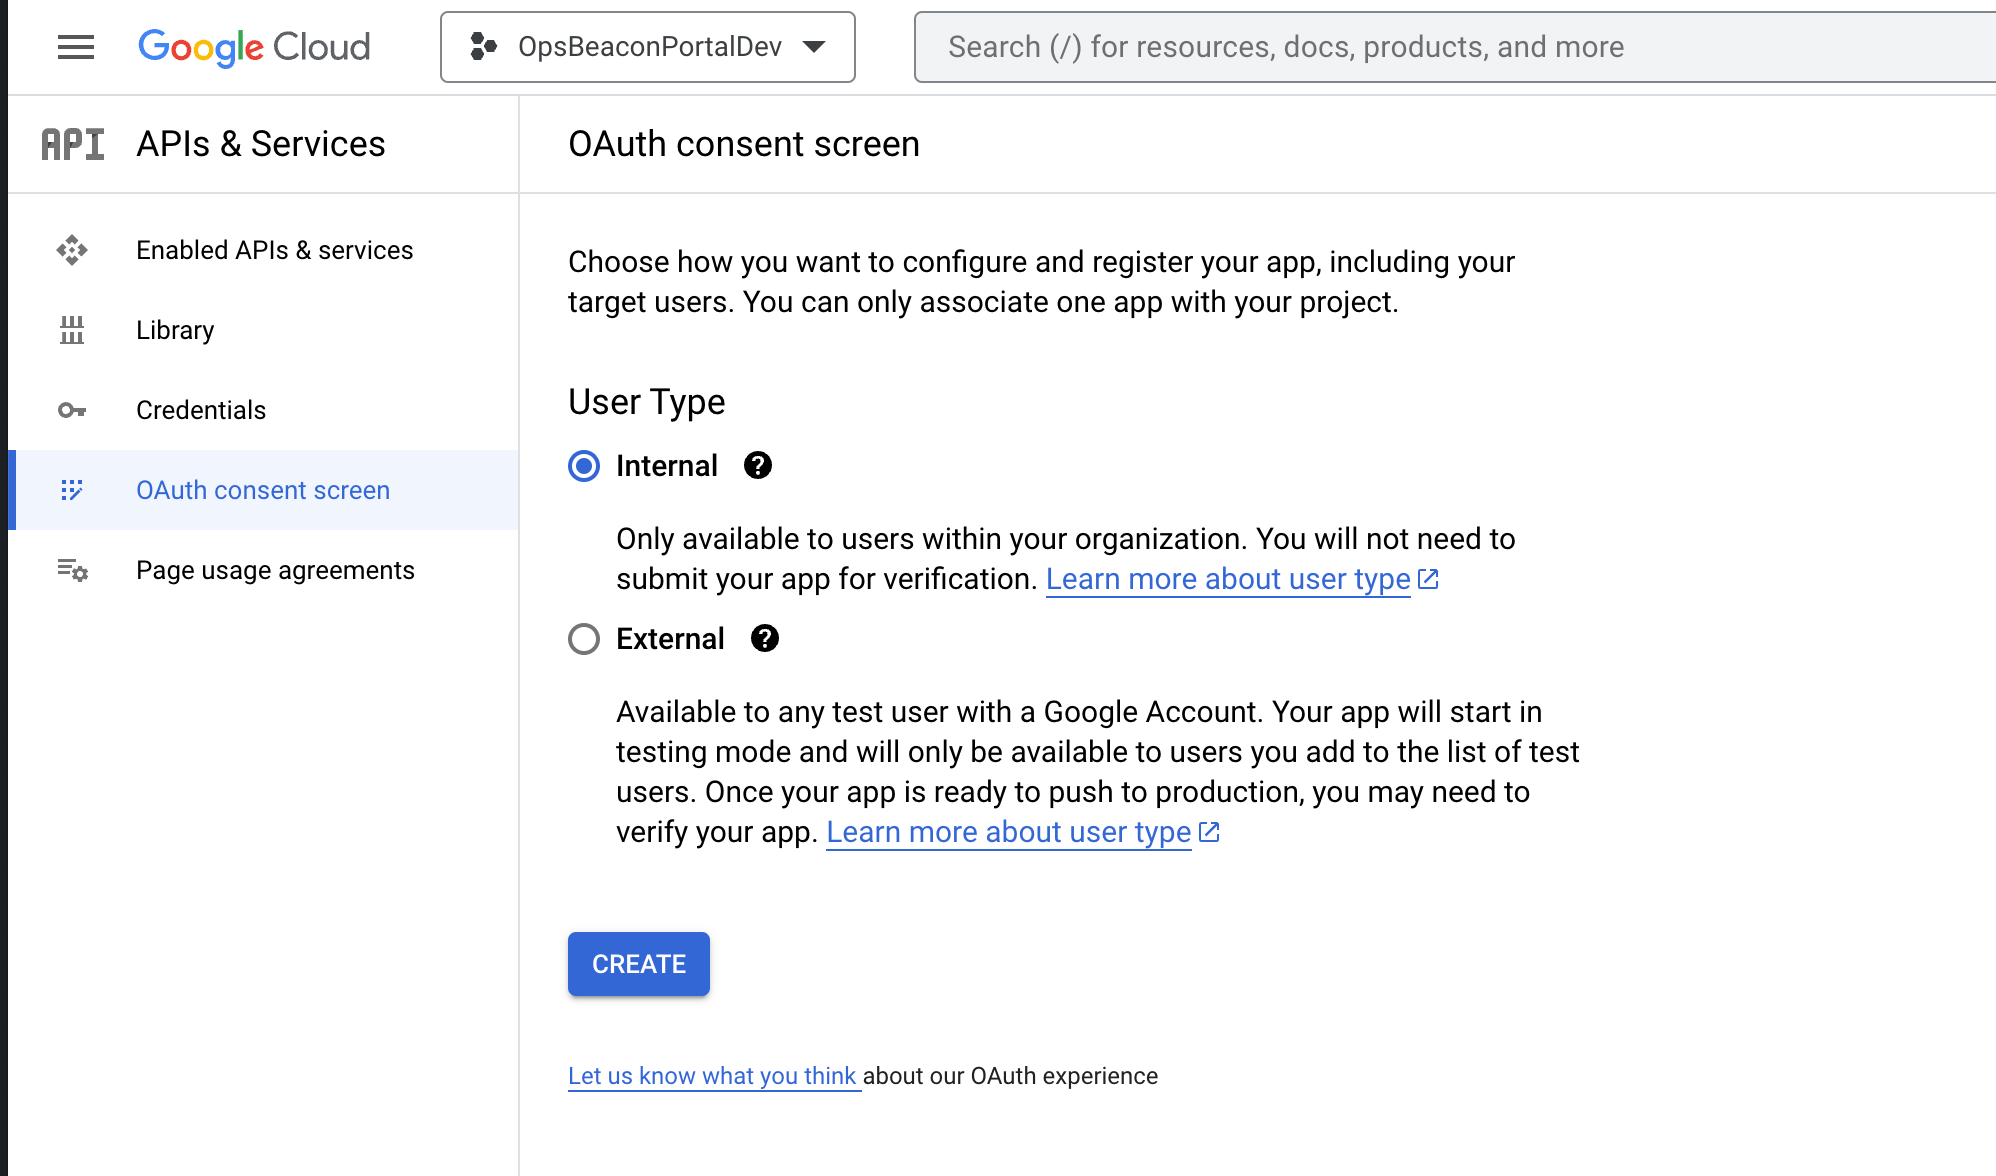
Click Create.
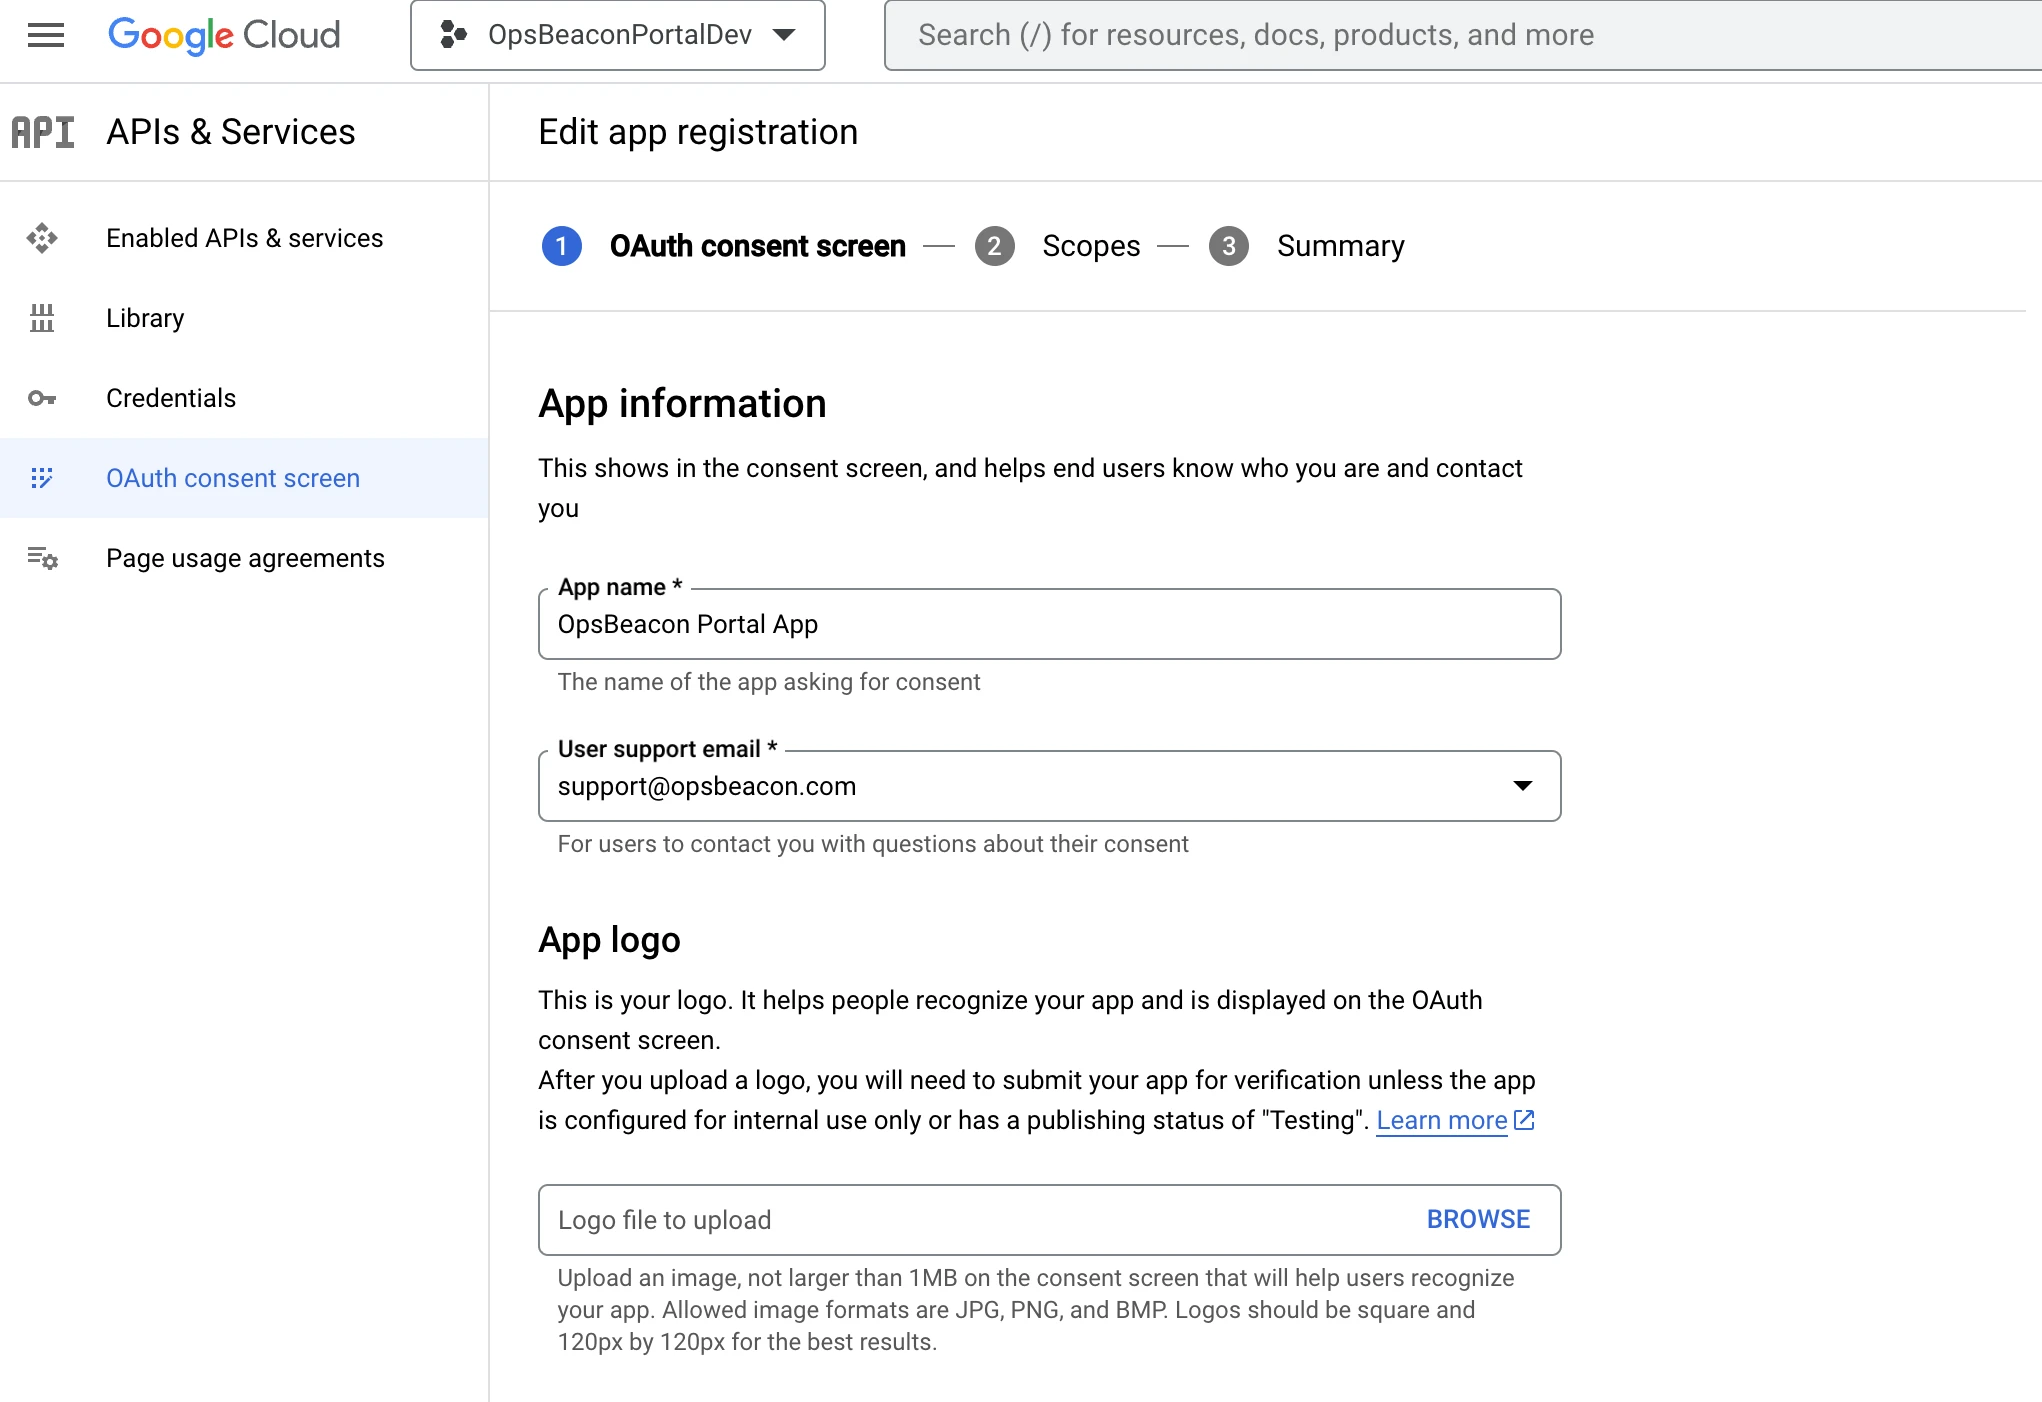
On the next page, you can provide more information about this App. You can provide any support email or any App name that you like.
Make sure you provide correct App Domain and Approved domain for your deployment.
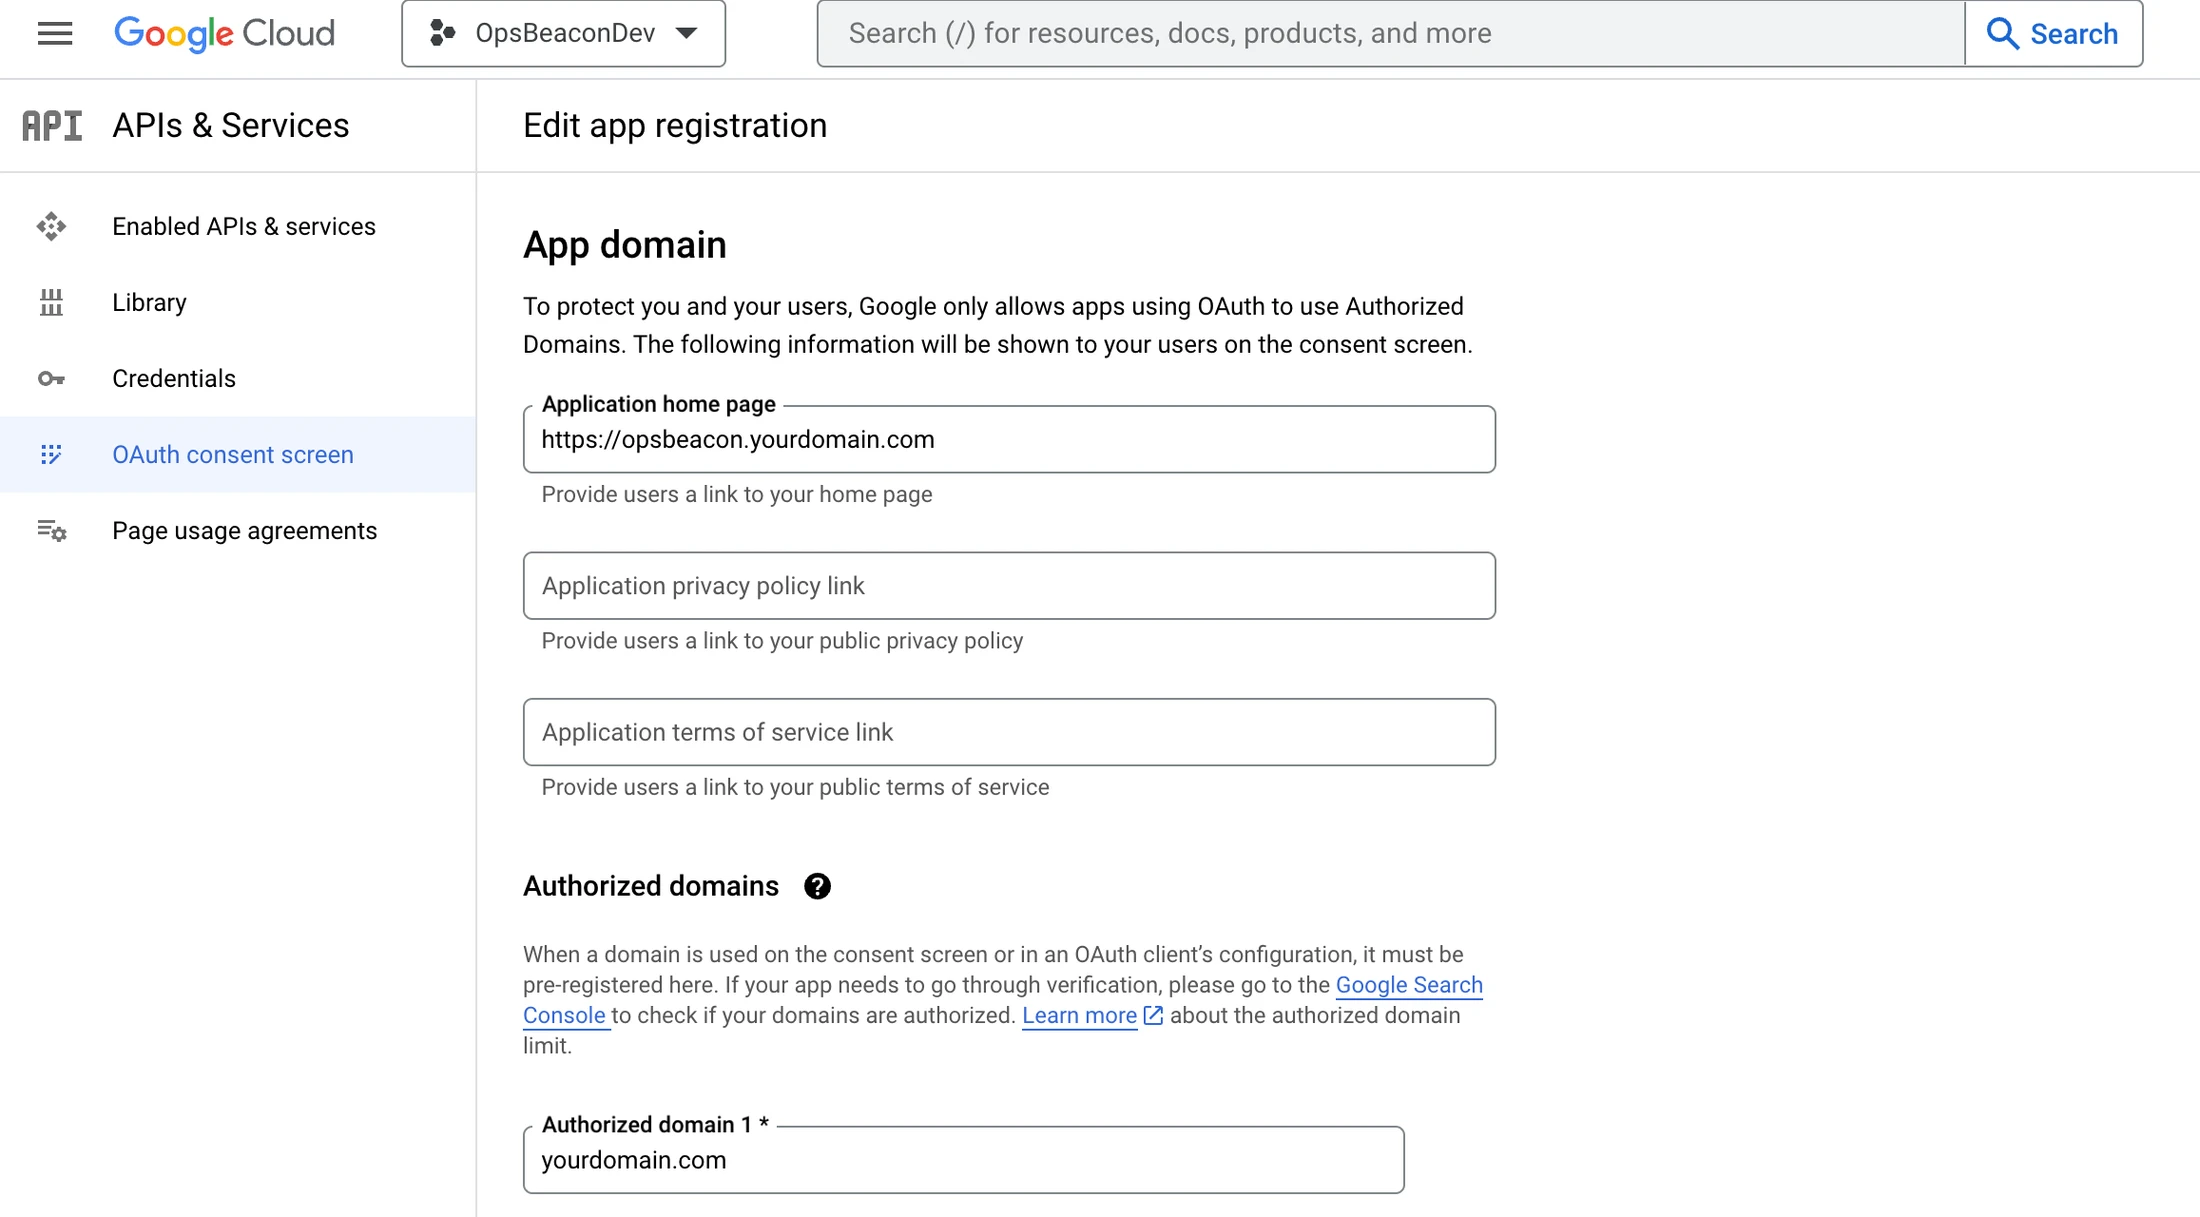
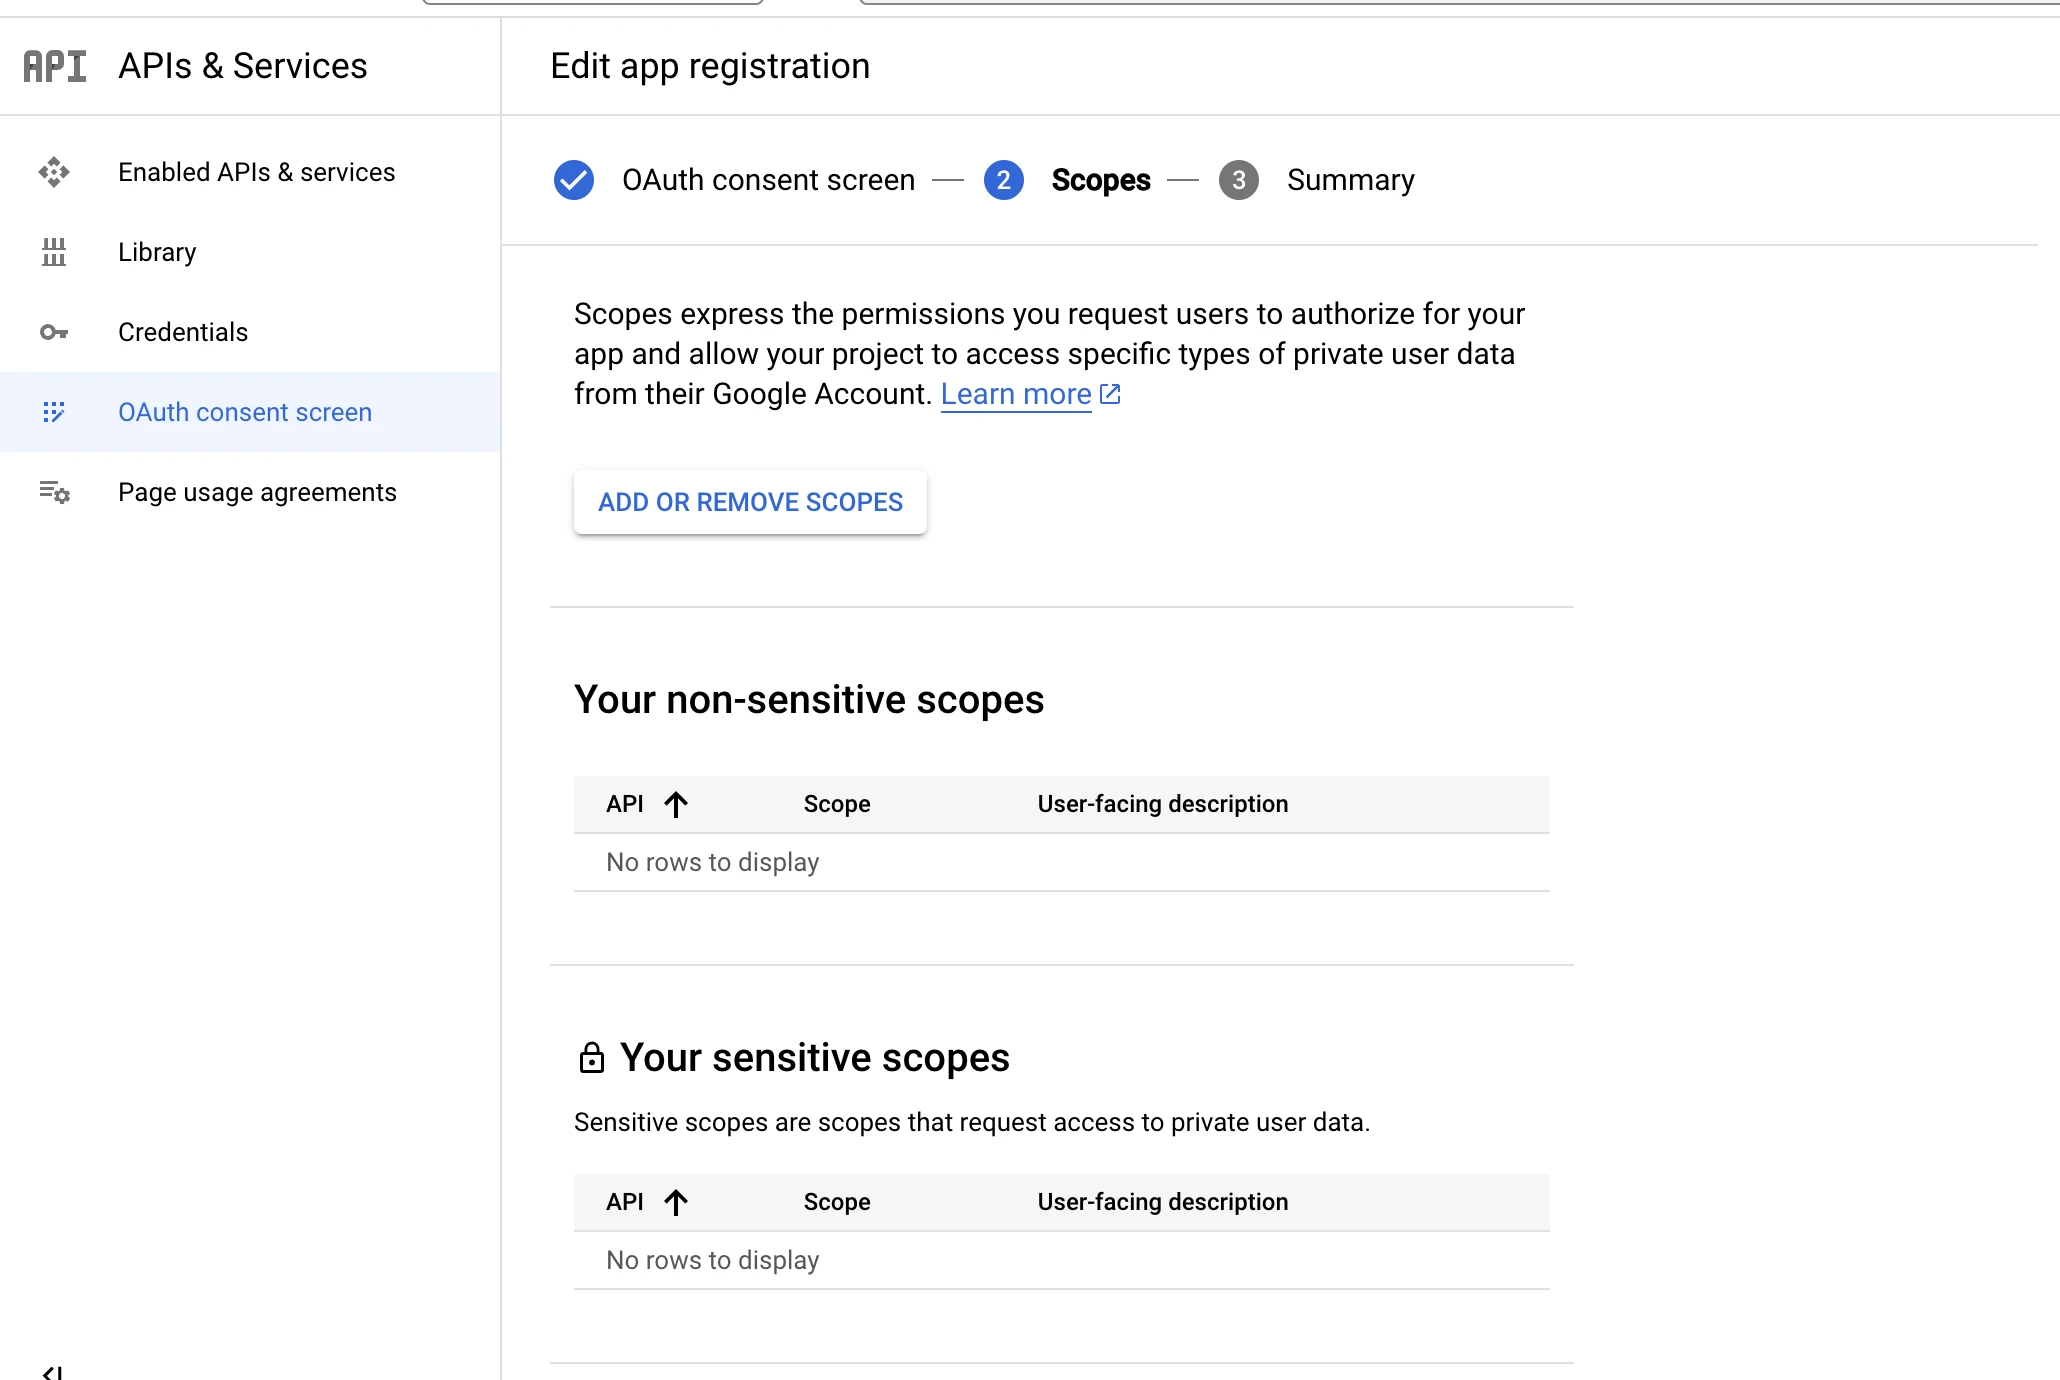
Save and Continue to move on to the next config page. No additional Scopes needed so move on to the last confirmation page and submit to create the App OAuth consent screen.
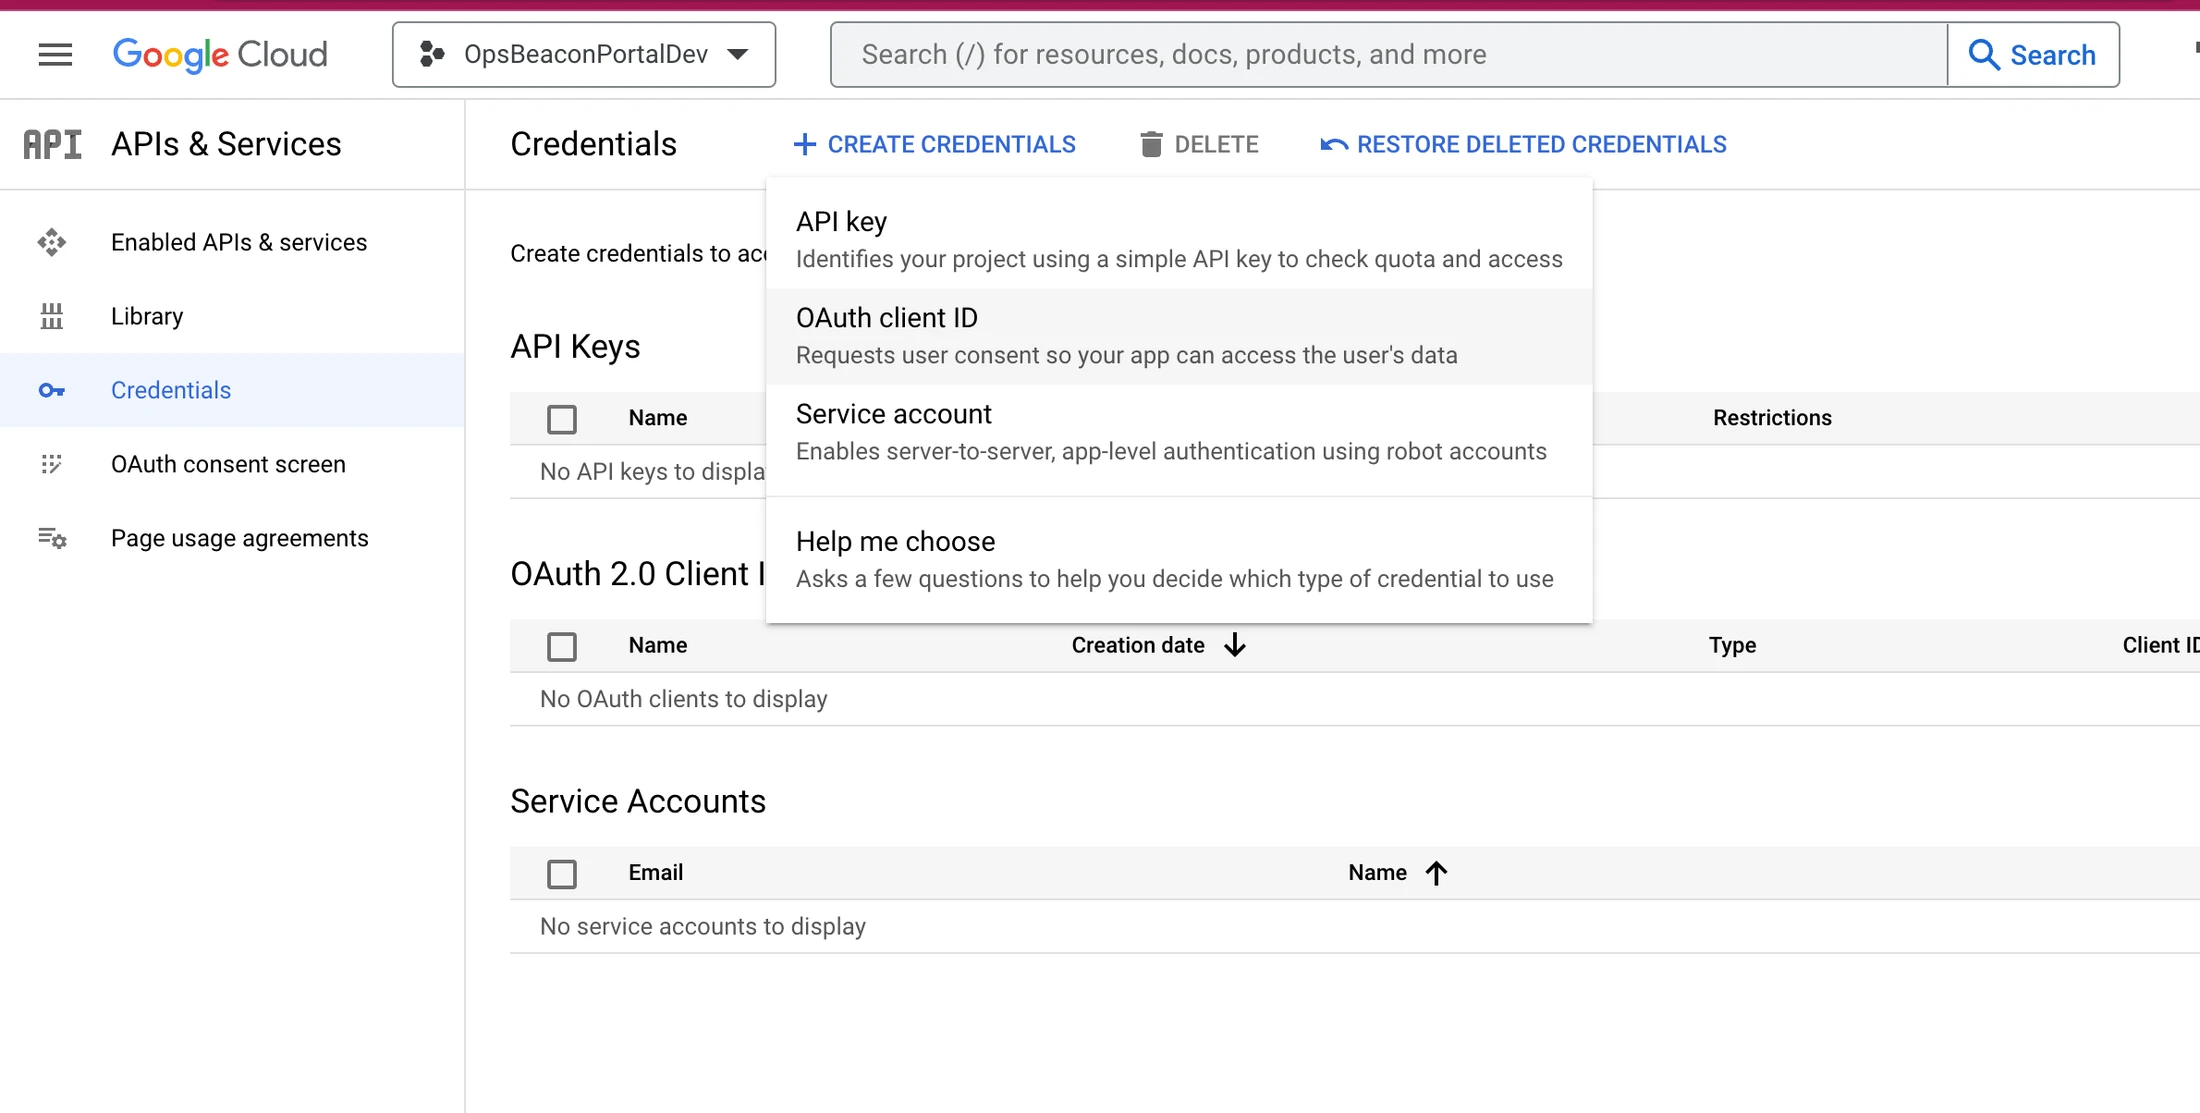
Step 3 - Create Credentials
Go to Credentials menu from the left. Click Create Credentials link and select OAuth client ID option. Once this is created, you will need to provide this client ID to OpsBeacon configuration file.
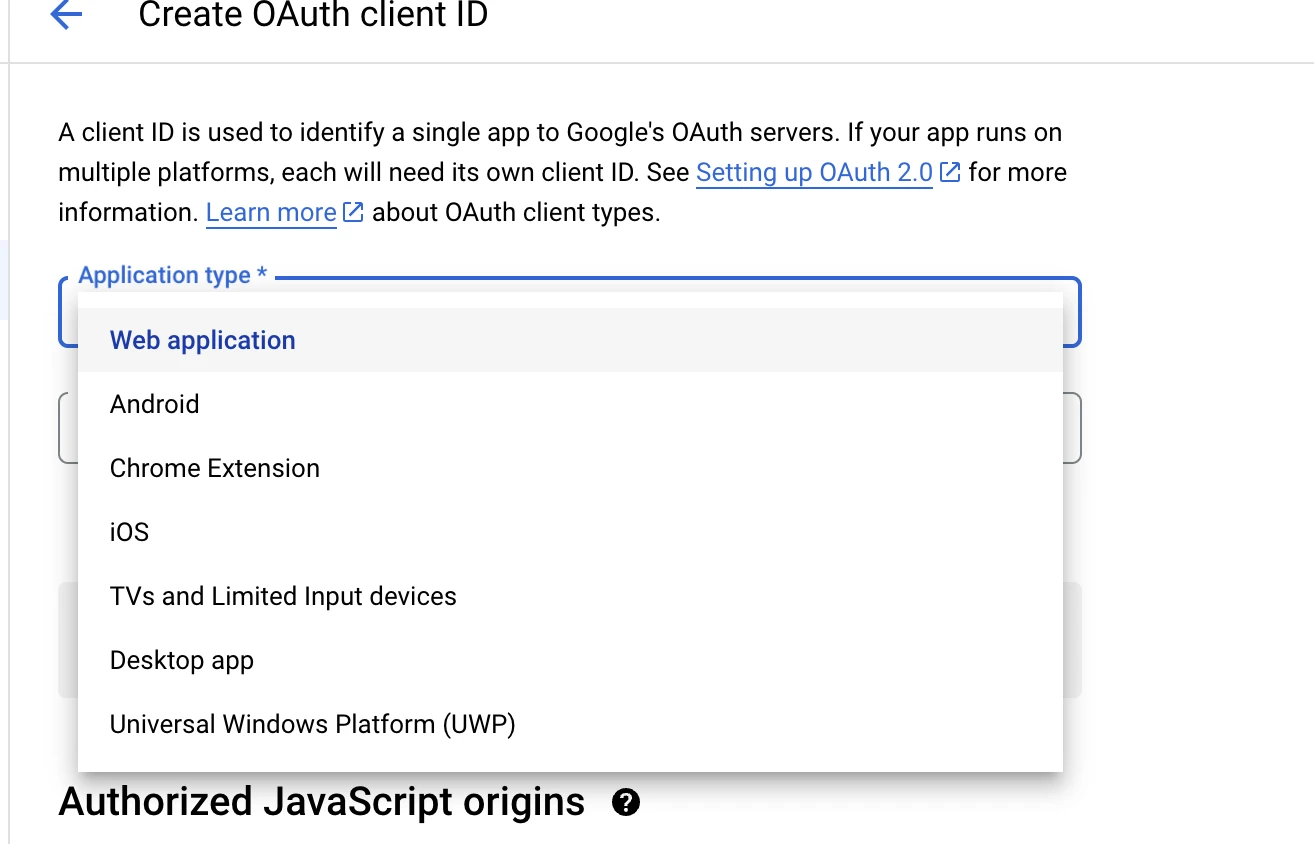
Select Web Application type client ID.
Add the App Domain to the Authorized JavaScript origins and click CREATE to create the client id.
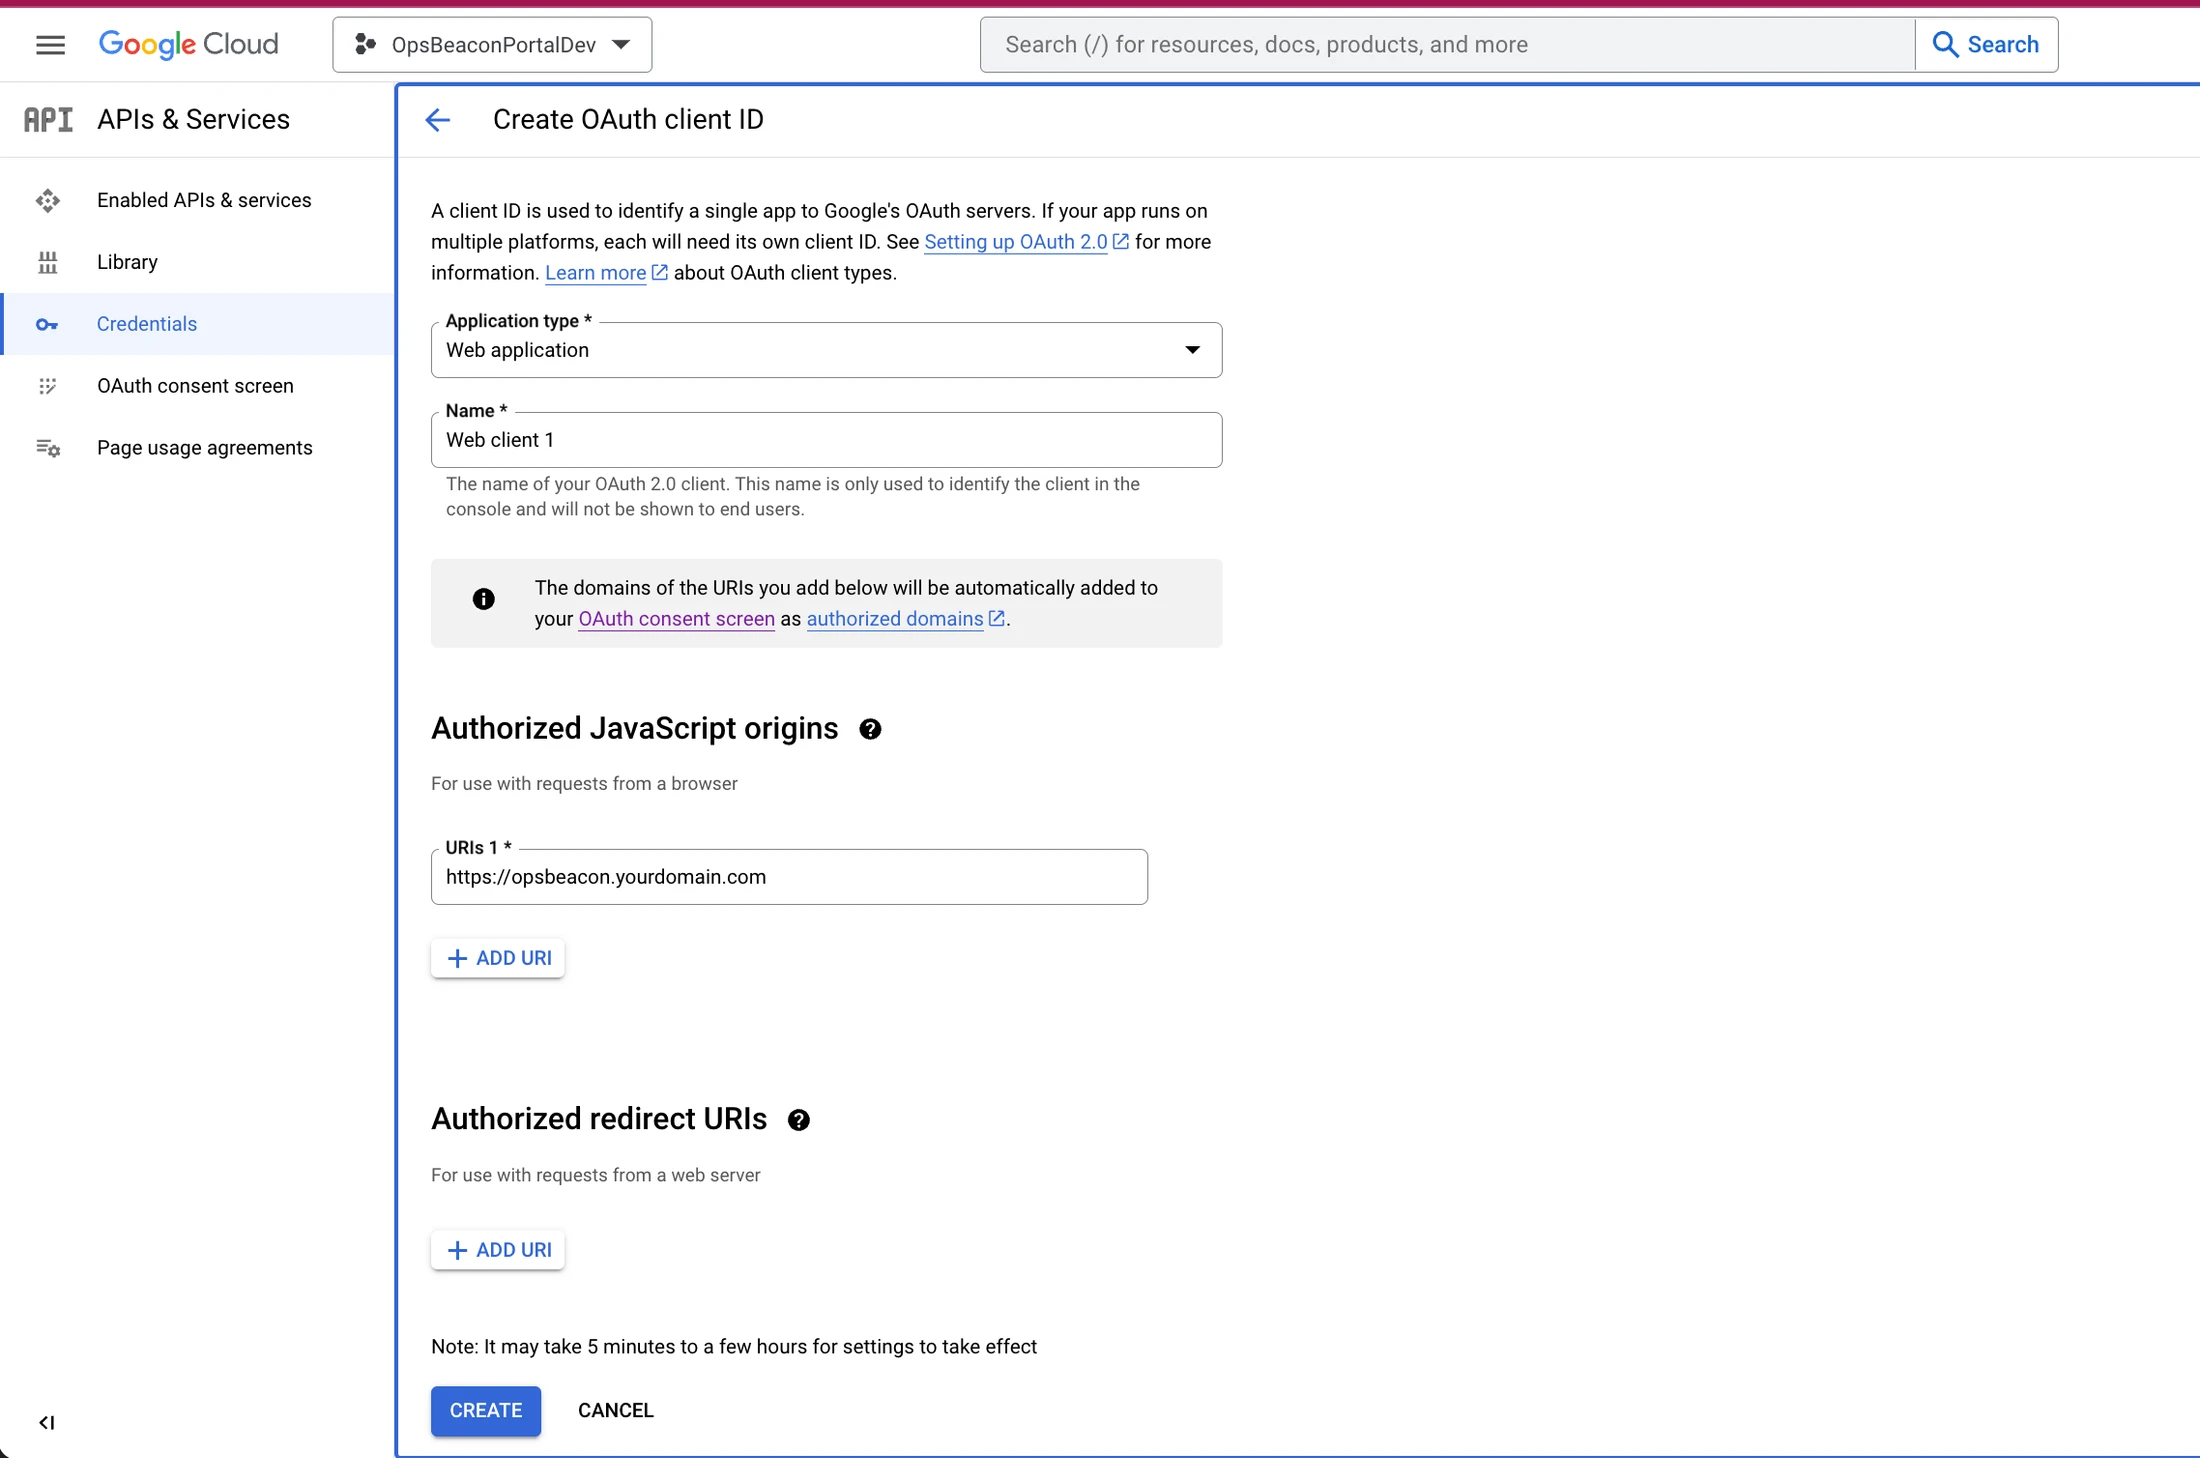
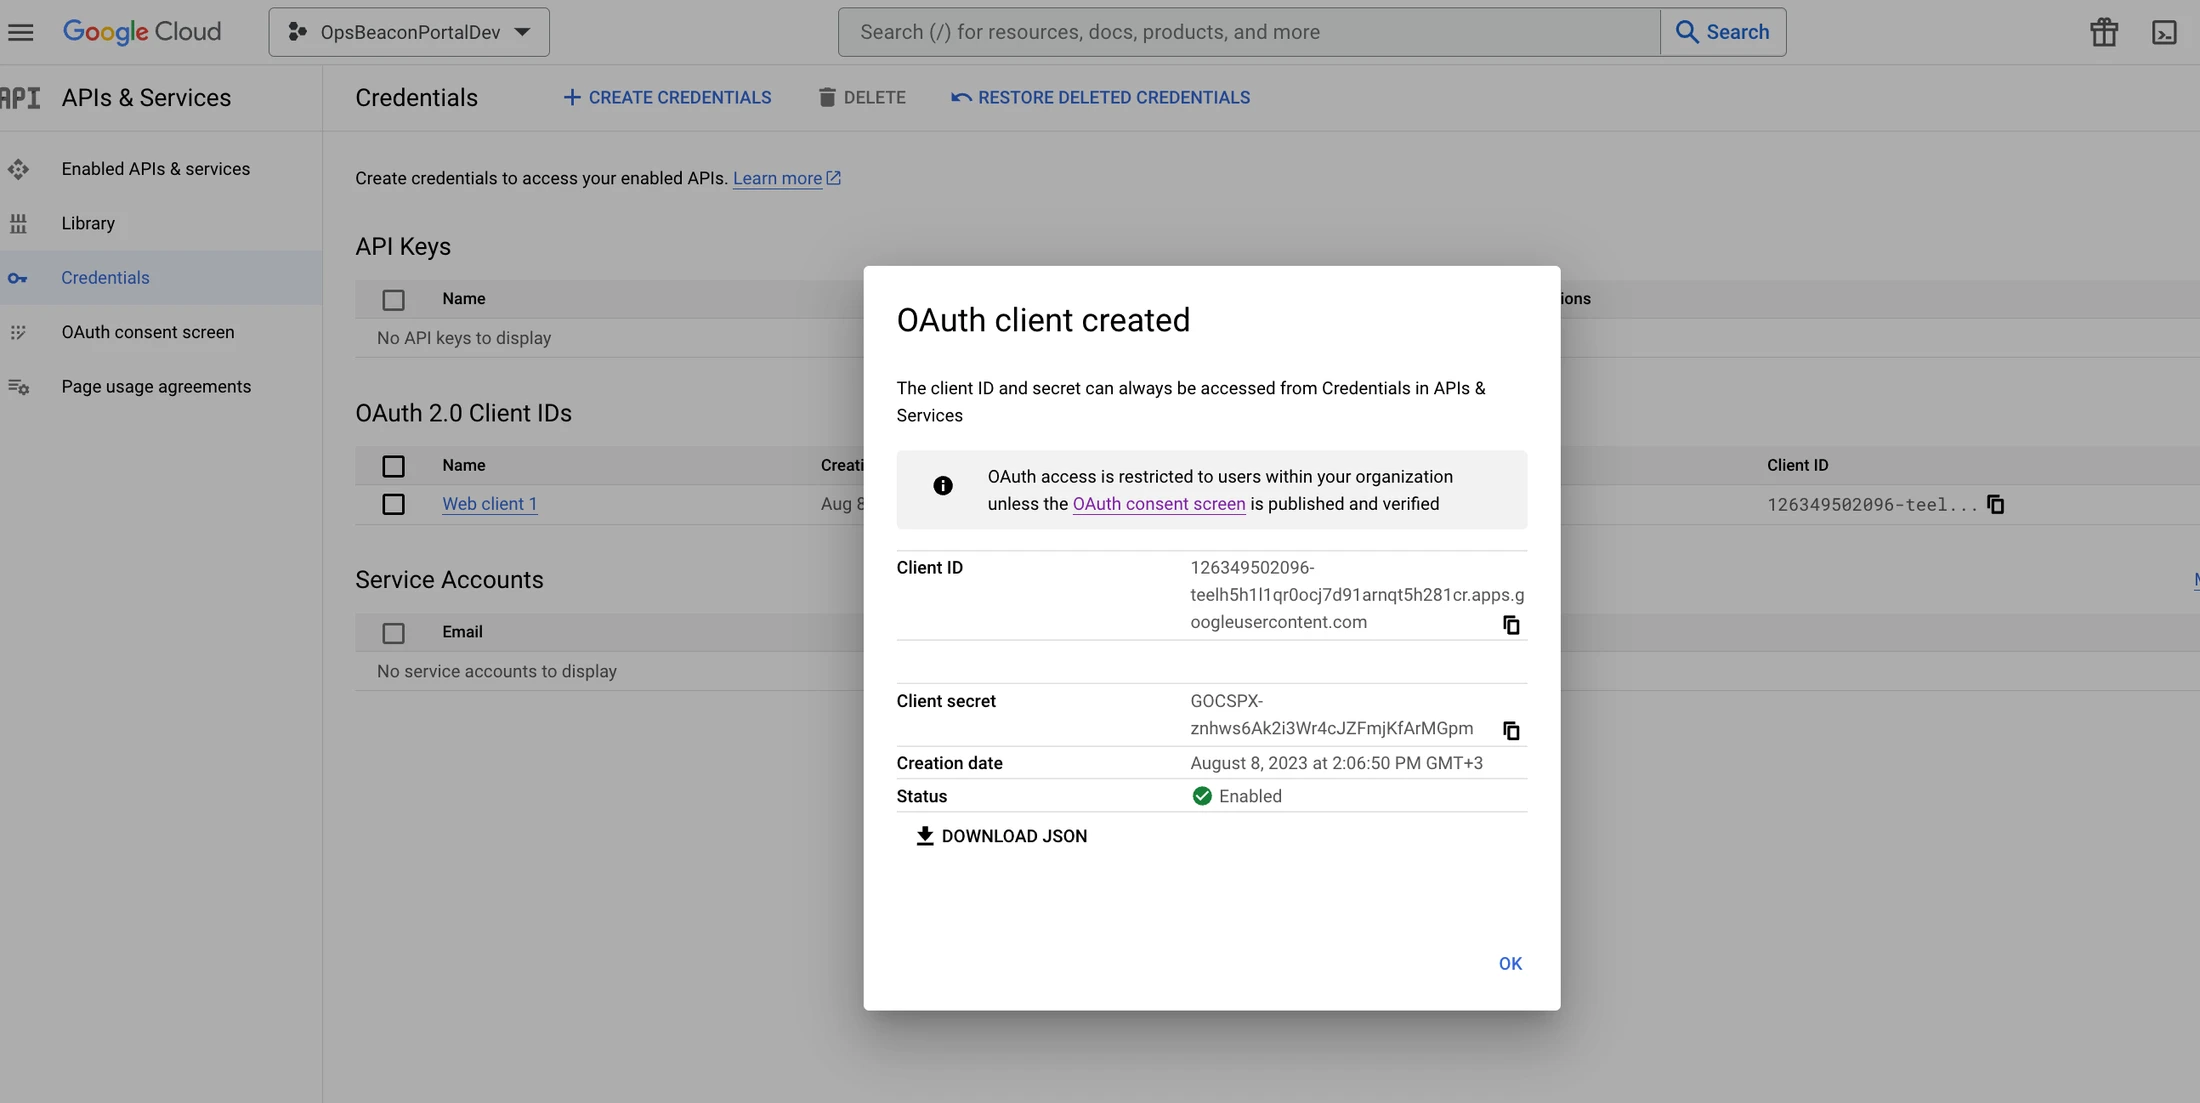
Once the credential is created, copy the client ID. You will need it in the next step.
Step 4 - Modify OpsBeacon environment variables
Under /opt/opsbeacon/src folder, there is a config.js file which is used by the portal application. We need to modify this file to add the google client id code.
window.ob = {};
window.ob.config = {
    apiRoot: "${REACT_APP_OB_API_ROOT}",
    slackClientId: "${REACT_APP_SLACK_CLIENT_ID}",
    slackRedirectUrl: "${REACT_APP_SLACK_REDIRECT_URL}",
    slackScope: "app_mentions:read,channels:history,chat:write,files:read,groups:history,groups:read,im:history,users:write,users:read.email,users:read",
    slackUserScope: "channels:read,groups:read,channels:history",
    googleClientId: "${REACT_APP_GOOGLE_CLIENT_ID}",
};
But this config.js is dynamically generated by the /opt/opsbeacon/scripts/update_portal.sh script. So you should also modify this script in order to create config.js properly next time when there is an upgrade. Here is the updated /opt/opsbeacon/scripts/update_portal.sh script.
#!/bin/sh

#Source environment variables
. /etc/sysconfig/opsbeacon

sudo rm -rf /opt/opsbeacon/backup/src/

sudo cp -r /opt/opsbeacon/src /opt/opsbeacon/backup

sudo rm -rf /opt/opsbeacon/src/*

echo "update_portal.sh starting at `date`"
echo "update_portal.sh starting at `date`" >> /opt/opsbeacon/ob.log
sudo aws s3 sync s3://opsbeacon-assets/ob-app/ /opt/opsbeacon/src 2>&1 >> /opt/opsbeacon/ob.log

sudo chown -R ec2-user.ec2-user /opt/opsbeacon/src

# Change ob-app config file
cat > /opt/opsbeacon/src/config.js << EOF
window.ob = {};
window.ob.config = {
    apiRoot: "${REACT_APP_OB_API_ROOT}",
    slackClientId: "${REACT_APP_SLACK_CLIENT_ID}",
    slackRedirectUrl: "${REACT_APP_SLACK_REDIRECT_URL}",
    slackScope: "app_mentions:read,channels:history,chat:write,files:read,groups:history,groups:read,im:history,users:write,users:read.email,users:read",
    slackUserScope: "channels:read,groups:read,channels:history",
    googleClientId: "${REACT_APP_GOOGLE_CLIENT_ID}",
};
EOF
echo "update_portal.sh completed at `date`" >> /opt/opsbeacon/ob.log
echo "update_portal.sh completed at `date`"
cat /opt/opsbeacon/src/config.js

sudo chown -R nginx:nginx /opt/opsbeacon/src
This script will read the REACT_APP_GOOGLE_CLIENT_ID environment variable from /opt/opsbeacon/.env file. So make sure you add this to the environment file.